Instant Messaging Service (Jabber/XMPP)
Zentyal uses Jabber/XMPP as its IM protocol and ejabberd [3] as XMPP server, integrating network users with Jabber accounts.
| [3] | Jabber: http://www.ejabberd.im/ |
Configuring a Jabber/XMPP server with Zentyal
To configure the Jabber/XMPP server in Zentyal, first you must make sure in the Module Status that the Domain Controller and File Sharing module is enabled, because Jabber depends on this.
To configure the service, go to in the left-hand menu and configure the following parameters:
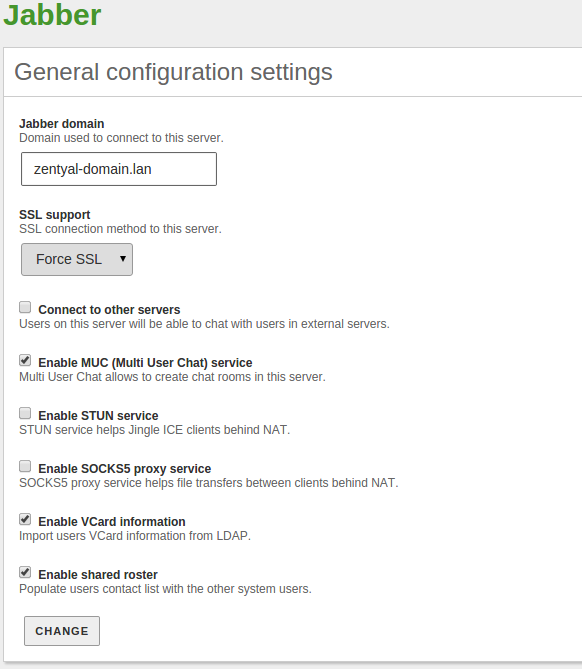
General Jabber Configuration
- Jabber Domain:
- Specifies the domain name of the server. This will make the user accounts to follow the format user@domain.
- SSL Support:
- Specifies whether the communications (authentication and messages) with the server are encrypted or in plain text. You can disable it, make it mandatory or leave it as optional. If you leave it as optional, it will be in the Jabber client configuration where you specify if you want to use SSL.
- Connect to other servers:
- Specify here if you want to allow your users to contact other users on external servers. Otherwise, if you want a private server, only for your internal network, leave this box unchecked.
- Enable MUC (Multi User Chat) service:
- Enables conference rooms (chat with more than two users).
- Enable STUN service:
- Server that implements a set of methods to be able to establish connections between clients that are behind a NAT, for example for videoconferences using Jingle.
- Enable SOCKS5 proxy service:
- Proxy service for TCP connections. This option allows clients behind a NAT to send files.
- Enable VCard information:
- Manage the contact information using the VCard format.
- Enable shared roster:
- Automatically add all users of this server as contacts.
To create a Jabber/XMPP user account, go to . Once the new account has been created, the Jabber account will also be enabled by default. For existing users, you can enable or disable Jabber accounts in the user configuration.
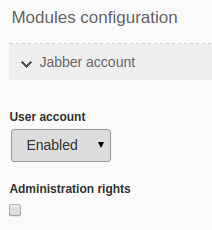
Jabber accounts
As you can see, a section called Jabber account will appear. Here you can select whether the account is enabled or disabled. Moreover, you can specify whether this specific user will have administrator privileges. Administrator privileges allow to see which users are connected to the server, send them messages, set the message displayed when connecting (MOTD, Message Of The Day) and send a notice to all connected users (broadcast).
In case you don´t want that a Jabber/XMPP account is created by default, you can configure it in .
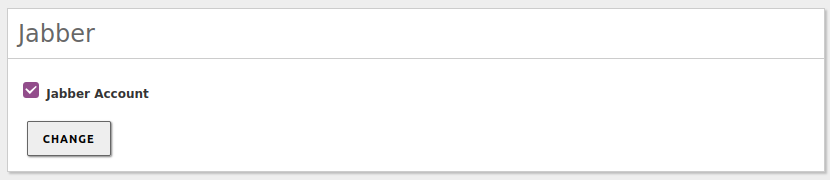
Create Jabber accounts by default
Tip
Remember to check in the corresponding sections of the Firewall module: that the Jabber service is allowed.
Workaround
There is a workaround applied due to a bug in Jabber’s Systemd. The workaround applied is here [5] and the mentioned bug is here [6] .
| [5] | Workaround: https://github.com/zentyal/zentyal/commit/84835f8ec942980f5bdebbe027f00d0d7ce15d7e |
| [6] | Bug: https://bugs.launchpad.net/ubuntu/+source/ejabberd/+bug/1970791 |