Virtualization Manager
Zentyal offers easy management of virtual machines by integrating the KVM [1] solution.
| [1] | KVM: http://en.wikipedia.org/wiki/Kernel-based_Virtual_Machine |
Creating virtual machines with Zentyal
Through the menu, you can access the list of currently existing machines, as well as add new ones or delete the existing ones. You can also carry out other maintenance tasks that will be described in detail in the next section.
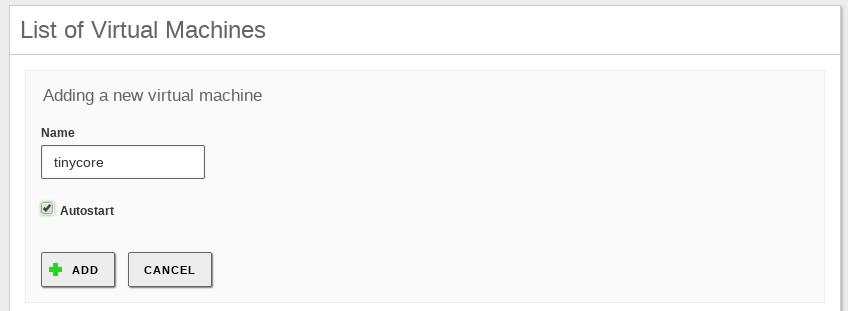
When you create a machine, first you have to click in Add new and then fill the following fields:
- Name:
- Used for identification purposes only, it will also determine the file system path where you will store the data associated with this machine. Essentially, you can enter any alphanumeric label.
- Autostart:
- If this option is enabled, Zentyal will be in charge of starting or stopping the machine along with the rest of the services. Otherwise, Zentyal will just create the machine the first time you configure it and save changes. If not enabled, the system administrator will be in charge of performing these actions manually when he/she considers necessary.
Creating a new virtual machine
After this, you have a configuration row associated with your new machine.
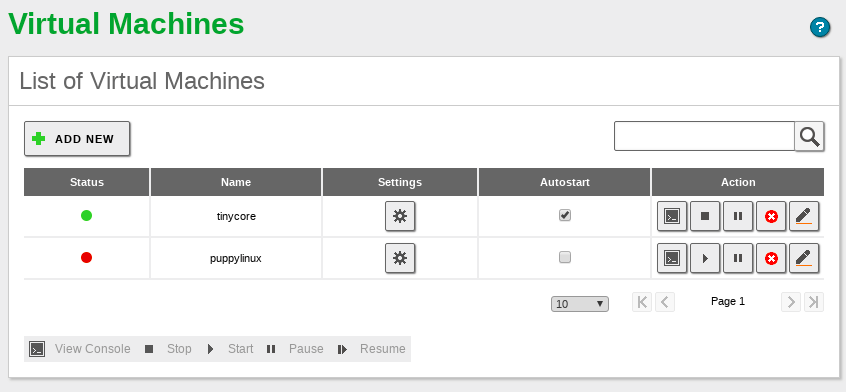
List of virtual machines
The next step is to configure your new virtual machine, through the Settings column, where you will find the following tabs:
- System Settings:
- It allows you to define the type of operating system that the machine will use. Also, you can define the architecture (32 or 64 bits). Finally, you can also define the size of the RAM memory allocated for this machine in megabytes. By default this value is 512, or half the available memory if you have less than 1GB in the real host.

General configuration of the virtual machine
- Network Settings:
- This configuration section contains the list of network interfaces of the virtual machine, which can be NAT (only to provide Internet access), in Bridged mode with one of the host system interfaces or forming an isolated Internal network, which name you have to define and to which other virtual machines can connect. If you uncheck the Enabled checkbox, you can temporally disable any of the configured network interfaces. As you can see below, it is also possible to modify the MAC address associated to the interface.
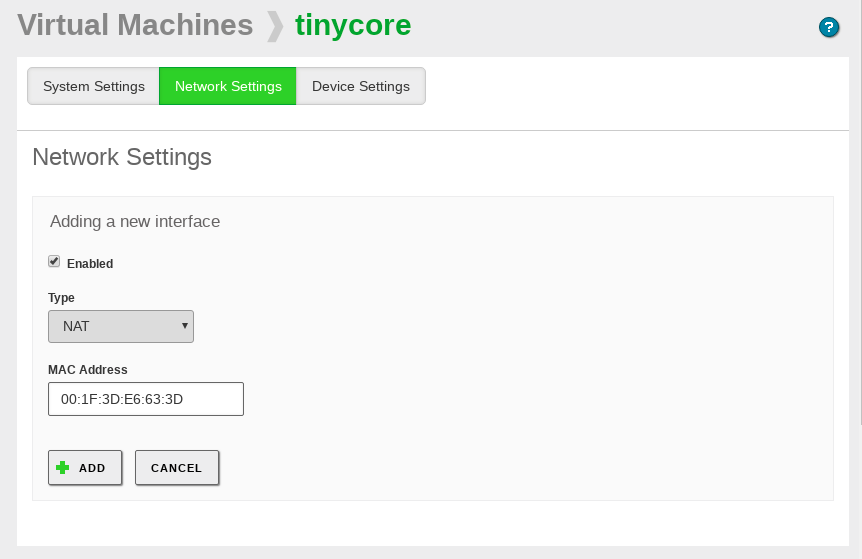
Configuration of the virtual machine network settings
- Device Settings:
- The last configuration section contains the list of storage drives associated with the machine. You can associate CDs or DVDs (providing the path to an ISO image) or the CD player of the host server or hard drivers. For the hard drives, you can also provide an image file of either KVM or VirtualBox, or just specify the size in megabytes and an identifier name and Zentyal will create the new empty disk. By unchecking the checkbox Enabled, you can temporally disconnect any of the drives without deleting them.
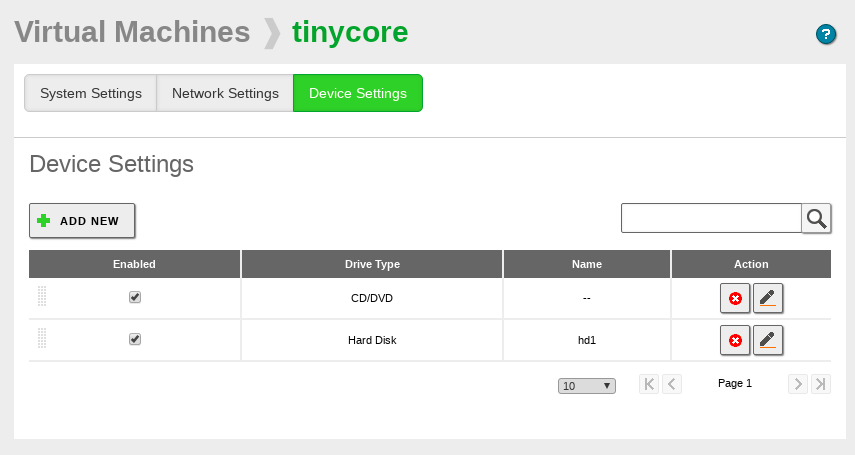
Configuration of the virtual machine device settings
Virtual machine maintenance
In the , you have a widget that contains the list of virtual machines and their current state (running or stopped) and a button that allows you to Stop or Start them if you want to.
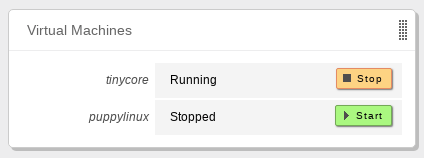
VM Widget on the Dashboard
In the section, you can see - from left to right, the following actions that you can carry out on a machine:
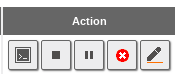
Highlighting the action buttons and status indicator
- View Console:
- Opens a pop-up window in which you can access the terminal of the virtual machine, using the VNC protocol.
- Start/Stop:
- Allows you to start or stop the machine, depending on its current state. In case the machine is in ‘Pause’ state, the ‘Start’ button will resume execution.
- Pause/Continue:
- Allows you to pause the execution of the machine while it is running, without losing the running state. Once the machine is paused, you can click the same button to resume execution.
- Delete:
- Allows you to delete the virtual machine.
- Edit:
- Allows you to edit the configuration of the virtual machine.
At the top left you can also see an indicator that is either red, yellow or green depending whether the machine is stopped, paused or running.
An example of a console view of a virtual machine:
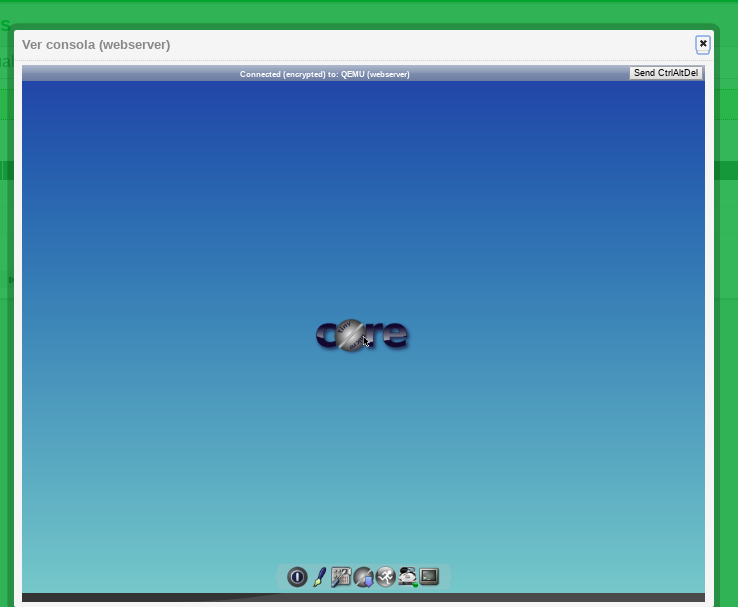
Example of a virtual machine with graphical environment shown from the terminal