High-level Zentyal abstractions
Network objects
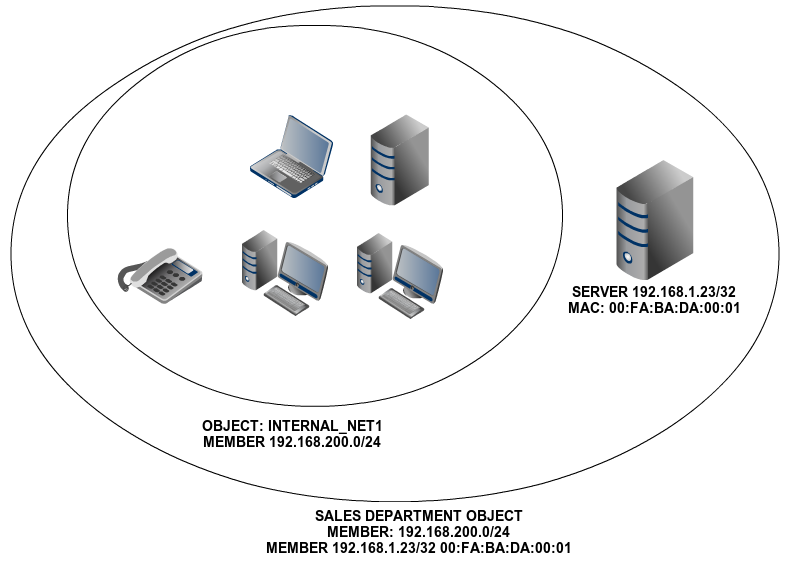
Network objects represent network elements, or a group of them. They allow you to simplify and consequently make it easier to manage network configuration: a network objects allow you to give an easily recognizable name to elements or a group of them. This means you can apply the same configuration to all elements.
For example, instead of defining the same firewall rule for each IP address of a subnetwork, you could simply define it for the network object that contains the addresses.
An object consists of any number of members. Each member consists of a network range or a specific host.
Management of Network objects with Zentyal
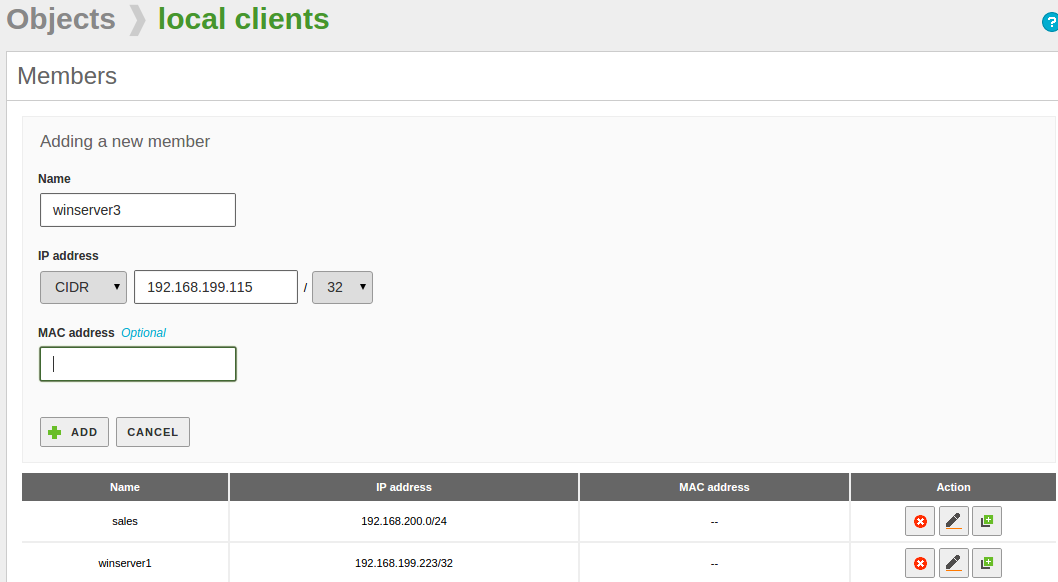
To start working with the Zentyal objects, go to section. Initially you will see an empty list. Once you have created the objects you will see the name of all the objects and a series of actions you can perform on each one of them. You can create, edit and delete objects that will be used later by other modules.
Each one of these objects consists of a series of members that can be modified at any time. The members must have at least the following values: Name, IP Address and Netmask. The MAC address is optional, you can only use it on members that represent a single host (/32).
The members of one object can overlap with members of other objects. This is very useful to establish arbitrary groups, but you have to consider them when using the rest of the modules to obtain the wanted configuration and to avoid conflicts.
In some configuration sections of Zentyal, where you can use network objects (like DHCP or Firewall), a quick embedded menu will be offered, so you can create and configure the network objects without explicitly accessing this menu section.
Network services
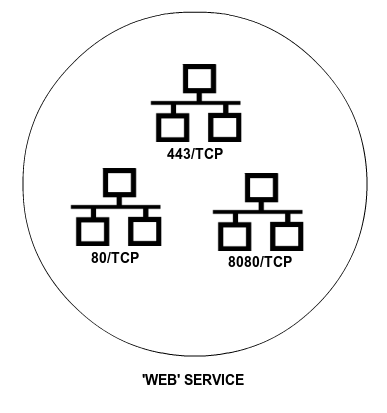
Network services is a way to represent the protocols (TCP, UDP, ICMP, etc.) and the ports used by an application or a group of related applications. The purpose of the services is similar to that of the objects: objects simplify reference to a group of IP addresses with a recognisable name. Services allows identification of a group of ports by the name of the services the ports have been allocated to.
When browsing, for example, the most usual port is the HTTP port 80/TCP. But in addition, you also have to use the HTTPS port 443/TCP and the alternative port 8080/TCP. Again, it is not necessary to apply a rule that affects the browsing of each one of the ports, but the service that represents browsing and contain these three ports. Another example is the file sharing in Windows networks, where the server listens to the ports 137/TCP, 138/TCP, 139/TCP and 445/TCP.
Management of Network services with Zentyal
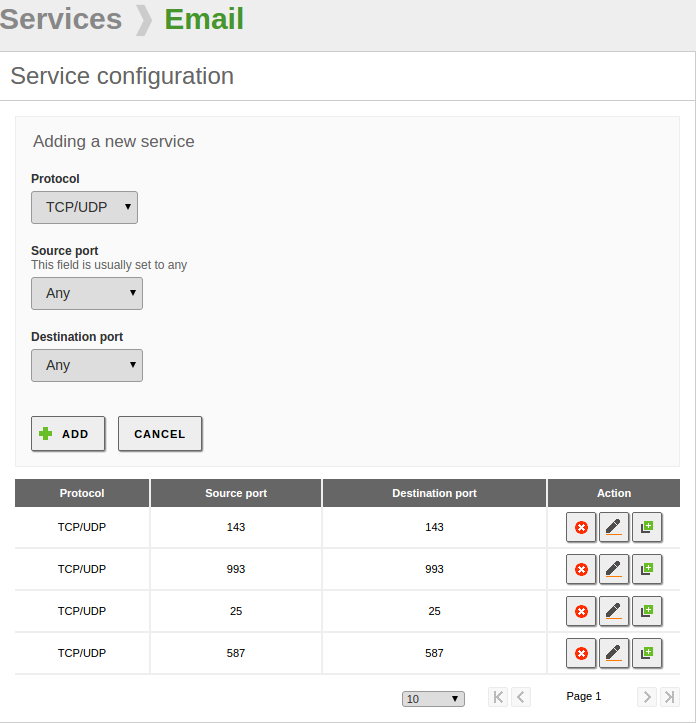
To manage services with Zentyal, go to menu, where you will find a list of available services, created by all the installed modules and those that were added later. You can see the Name, Description and access the Configuration. Furthermore, each service has a series of members; each one contains Protocol, Source port and Destination port values. You can introduce the value Any in all of the fields to specify, for example, the services for which the source port is different to the destination port.
TCP, UDP, ESP, GRE or ICMP protocols are supported. You can also use a TCP/UDP value to avoid having to add the same port twice when both protocols are used by a service, for example DNS.
| [1] | http://www.iana.org/assignments/port-numbers |
Practical examples
Practical example A
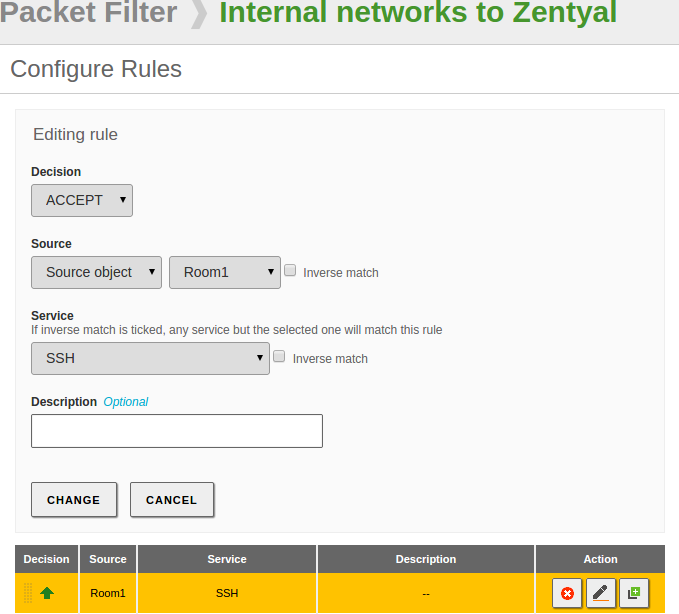
You have two internal networks but you only want to grant access to the SSH protocol in one of them. To simplify the task create two Network Objects, Room1 and Room2, each containing the range of IPs of one of the internal networks you want to classify. Room1 has SSH access, but Room2 doesn’t.
Creation of the network objects:
Each Network Object must include at least one Member, members will specify the network addresses included in the Object. To create the Members click on the Members button of the Object:
Finally, create a firewall rule to grant SSH access to users in Room1:
As a result, the two Network Objects will ease the administration of the users of our internal networks every time you want to apply rules or configure services to all IPs included in an Object.
Practical example B
Now that you have network infrastructure created, you want to grant email access to all users in Room1. In this case we will use a Network Service which is another kind of abstraction to represent protocols and ports used by an application or a group of related applications. The Network Service will simplify the firewall rule as it will include all the required ports used by the email service.
Network service creation:
Once created, we have to click on the configuration button to add the protocols and ports that will be included in the Service.
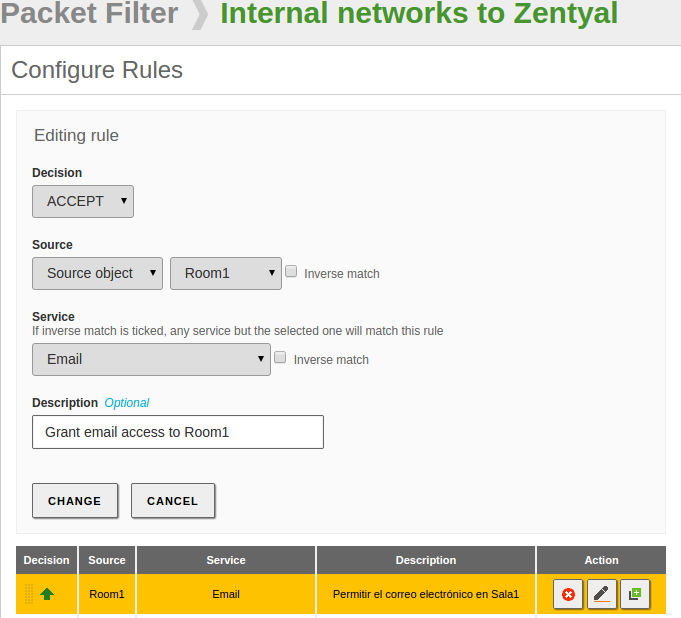
Finally we will create the rule including the Service in the Firewall:
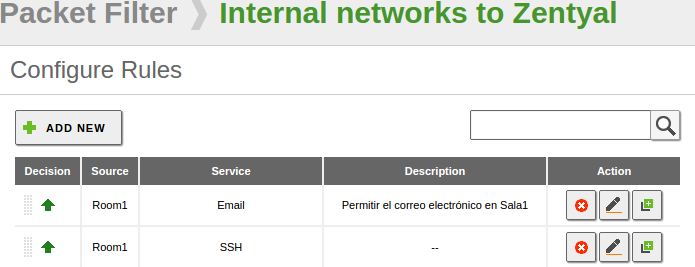
Add the rule and save the changes to apply it:
The Rule will grant email access in Room1 allowing all users to use the email normally. You will learn how to configure email accounts and use the email services in the Electronic Mail Service chapter.
