How to Change the IP in Zentyal
In this entry, we will explain how to change the IP of a Zentyal server.
Table of Contents
General Considerations
If we want to change the IP of the Zentyal server, it is necessary to consider which modules we have enabled. If we do not have the DNS [1] and Domain Controller [2] modules enabled, we simply need to change the IP in the Network module from the web administration panel. If, on the other hand, we have the aforementioned modules installed and enabled, we will need to take a series of additional actions to minimize possible issues.
In case you have the DHCP module [3] enabled with a configured IP address range, when you modify the IP address of the network interface through which Zentyal is serving the DHCP module, the system automatically removes the IP address range configured for the DHCP service.
| [1] | DNS: https://doc.zentyal.org/en/dns.html |
| [2] | Domain Controller: https://doc.zentyal.org/en/directory.html |
| [3] | DHCP: https://doc.zentyal.org/en/dhcp.html |
Without the DNS and Domain Controller Modules
This is the simplest case, as the DNS and Domain Controller modules are not enabled.
Laboratory Environment
The laboratory environment on which we will perform the tests has the following characteristics:
- Installed Modules: Network, Firewall, Logs, NTP.
- Network Interface: eth0 → 10.0.2.15
- Network Interface: eth1
- Current IP address eth1: 192.168.10.1
- Desired IP address eth1: 192.168.10.10
IP Change
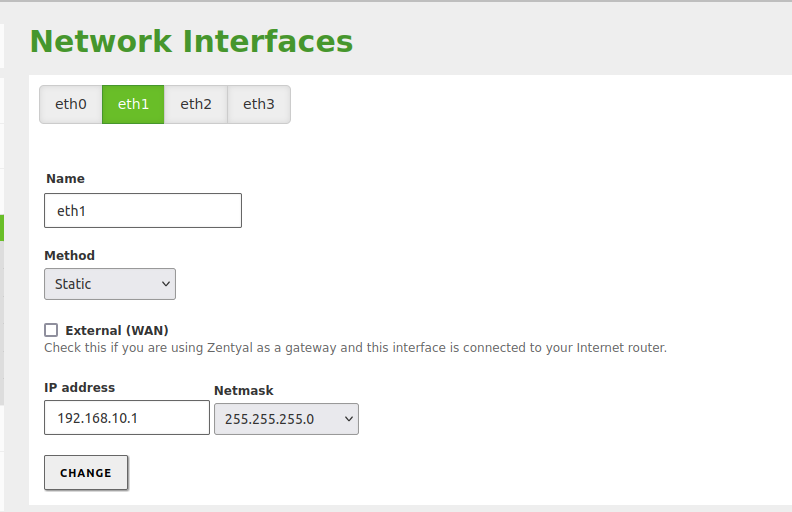
- We log in to the Zentyal administration panel, go to: Network -> Interfaces and select the network interface we want to change:
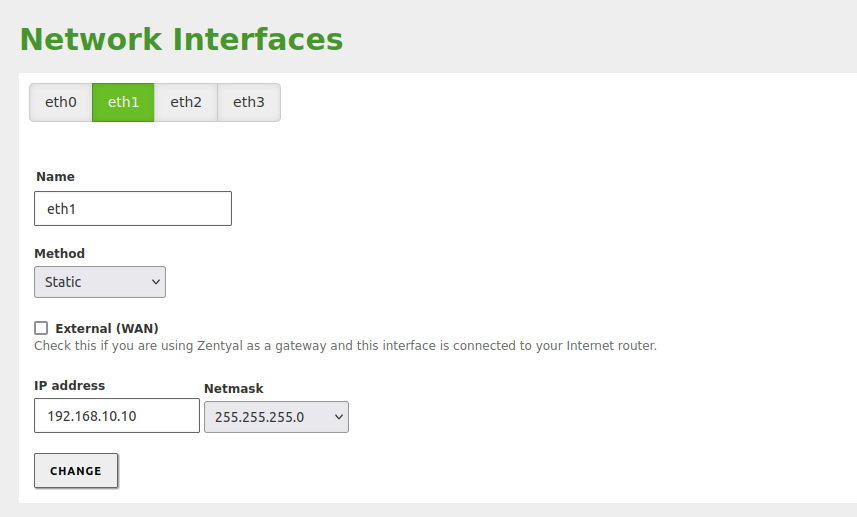
- We modify the IP and save changes:
Once the changes have been saved, we check from the command line that the change has been made correctly:
IP check:
sudo ip -4 addr show dev eth1
Results:
    eth1: <BROADCAST,MULTICAST,UP,LOWER_UP> mtu 1500 qdisc fq_codel state UP
group default qlen 1000
    inet 192.168.10.10/24 brd 192.168.10.255 scope global eth1
    valid_lft forever preferred_lft forever
Tip
In case the IP has not changed or the interface is down, we will need to check the log file: /var/log/zentyal/zentyal.log
With the Domain Controller
This change is more complex, as it requires performing several actions before and after the IP change.
Warning
The required actions will cause a temporary downtime of the DNS and Domain Controller modules.
Laboratory Environment
The laboratory environment on which we will perform the tests has the following characteristics:
- Installed Modules: Network, Firewall, Logs, DNS, Domain Controller, Mail, Webmail.
- Network Interface: eth0 → 10.0.2.15
- Network Interface: eth1
- Current IP address eth1: 192.168.10.1
- Desired IP address eth1: 192.168.10.10
- Domain administrator user: administrator
DNS records that need to change from IP 192.168.10.1:
DNS record for the domain
DNS record for the hostname
IP Change
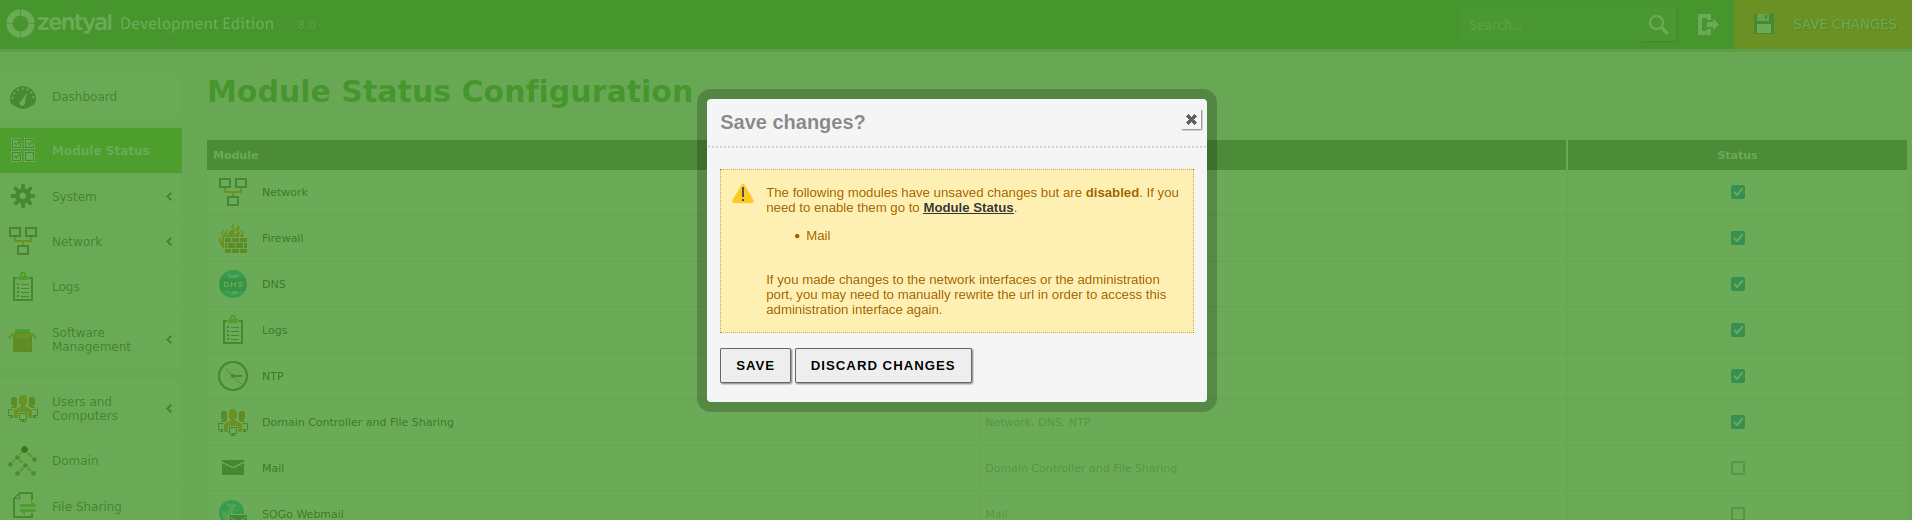
- We log in to the Zentyal administration panel, go to Enable Modules, select the DNS module to temporarily disable it:
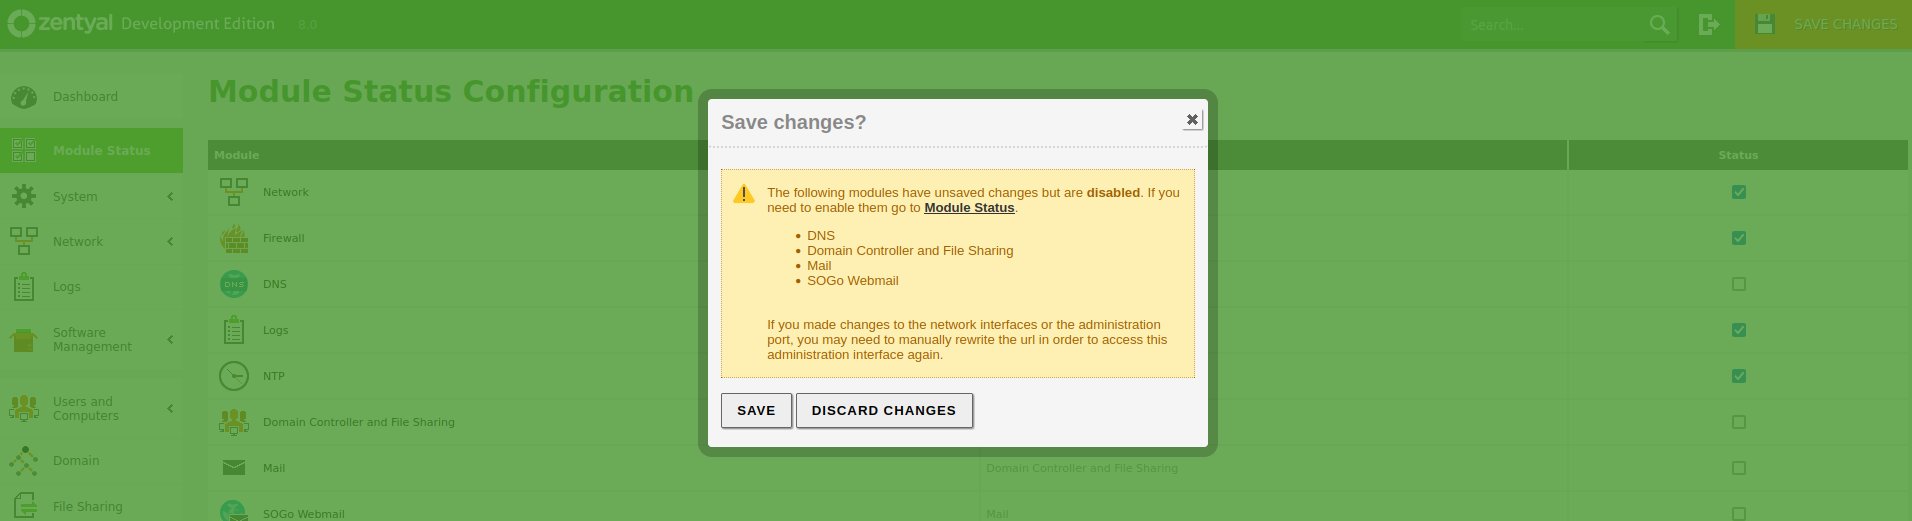
Disable DNS module
- We save changes.
- We go to Network -> Interfaces and select the network interface we want to change:
Initial setup of interface eth1
- We modify the IP and save changes:
Configuration of interface eth1
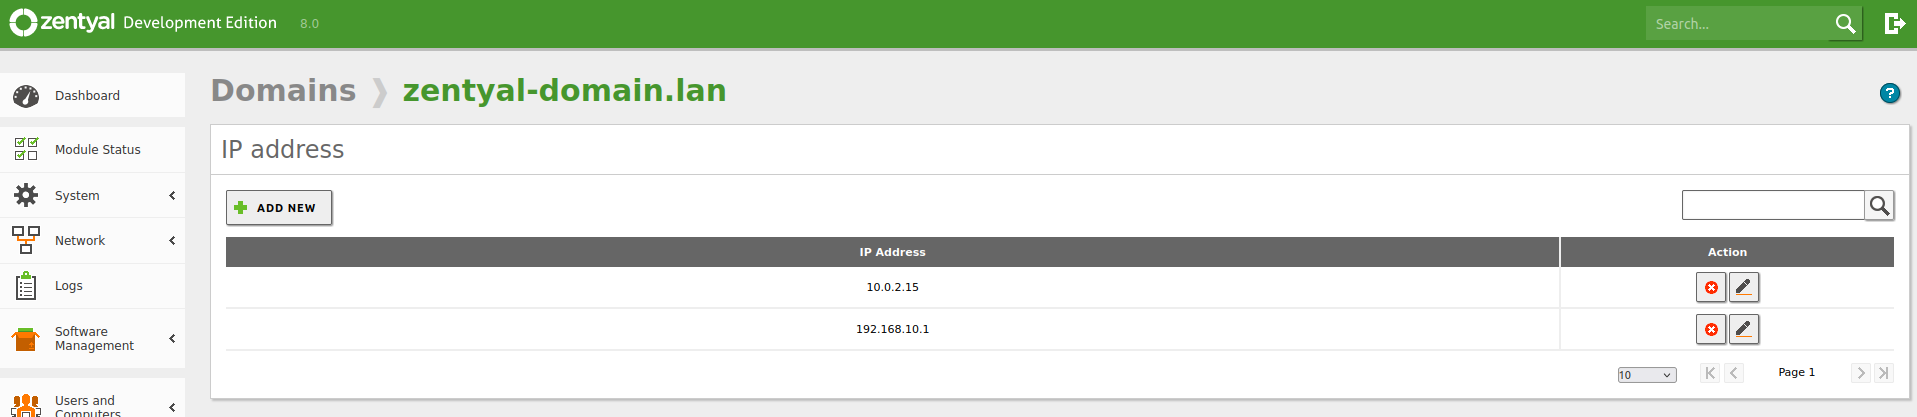
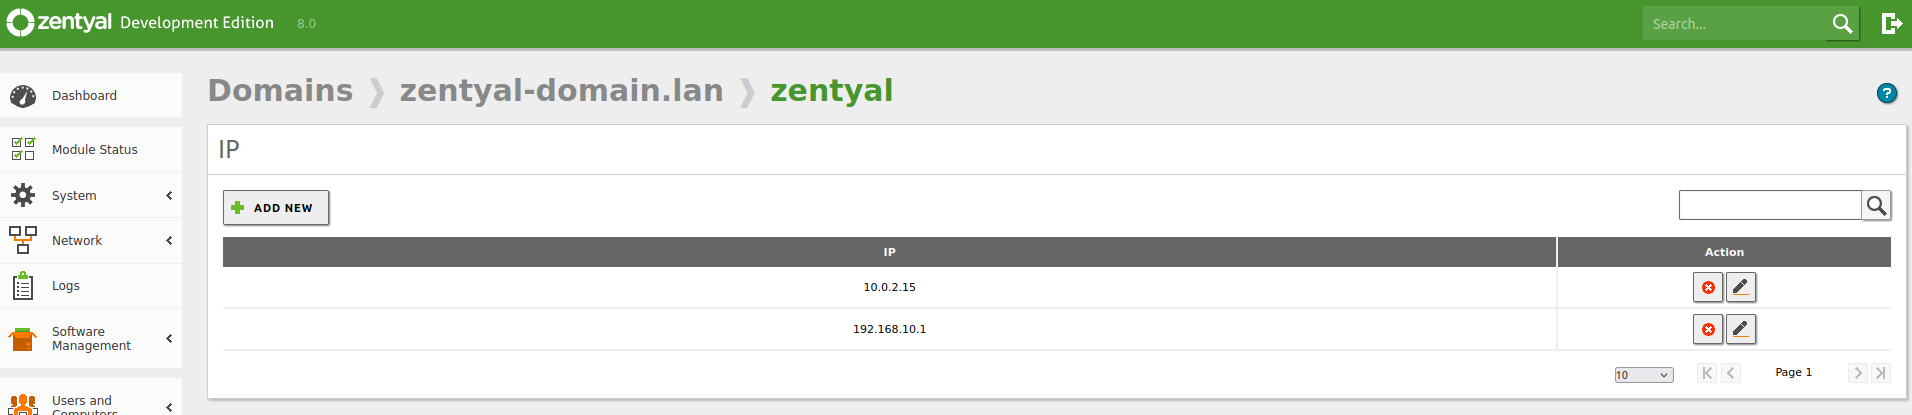
We check the DNS records for the domain and the server’s hostname from the DNS module under DNS -> Domain:
DNS records that should have changed to 192.168.10.10:
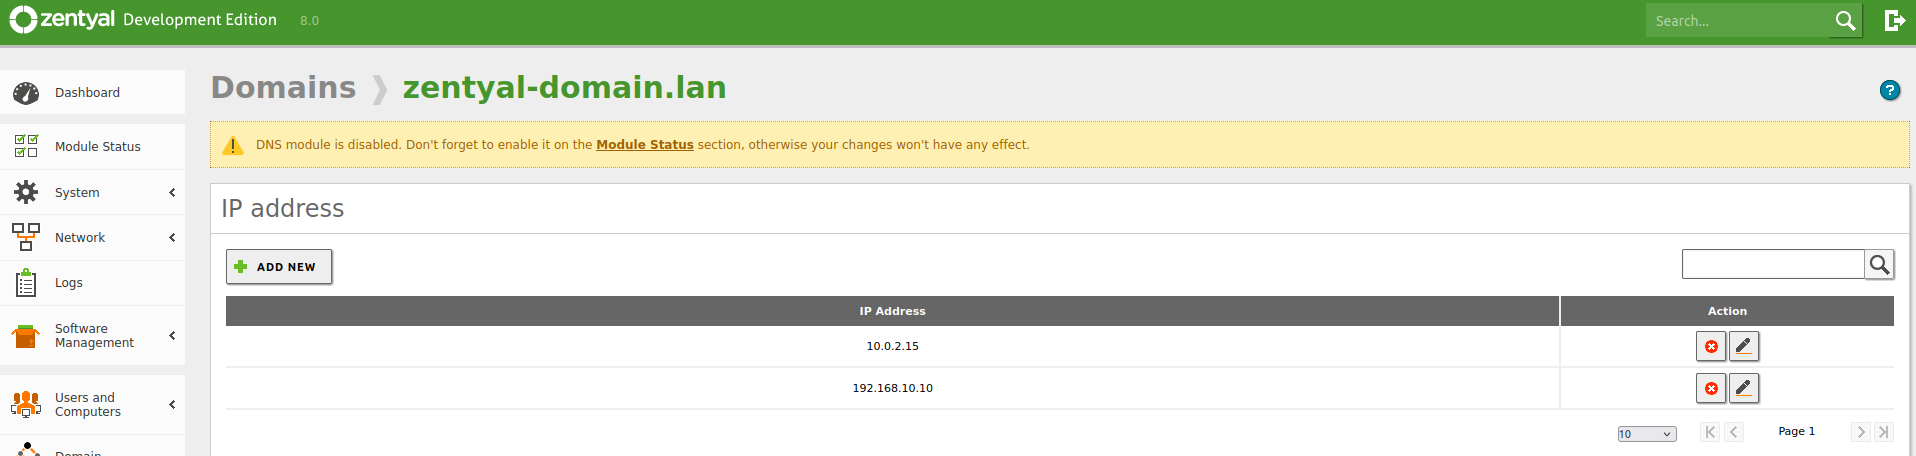
DNS record for the domain
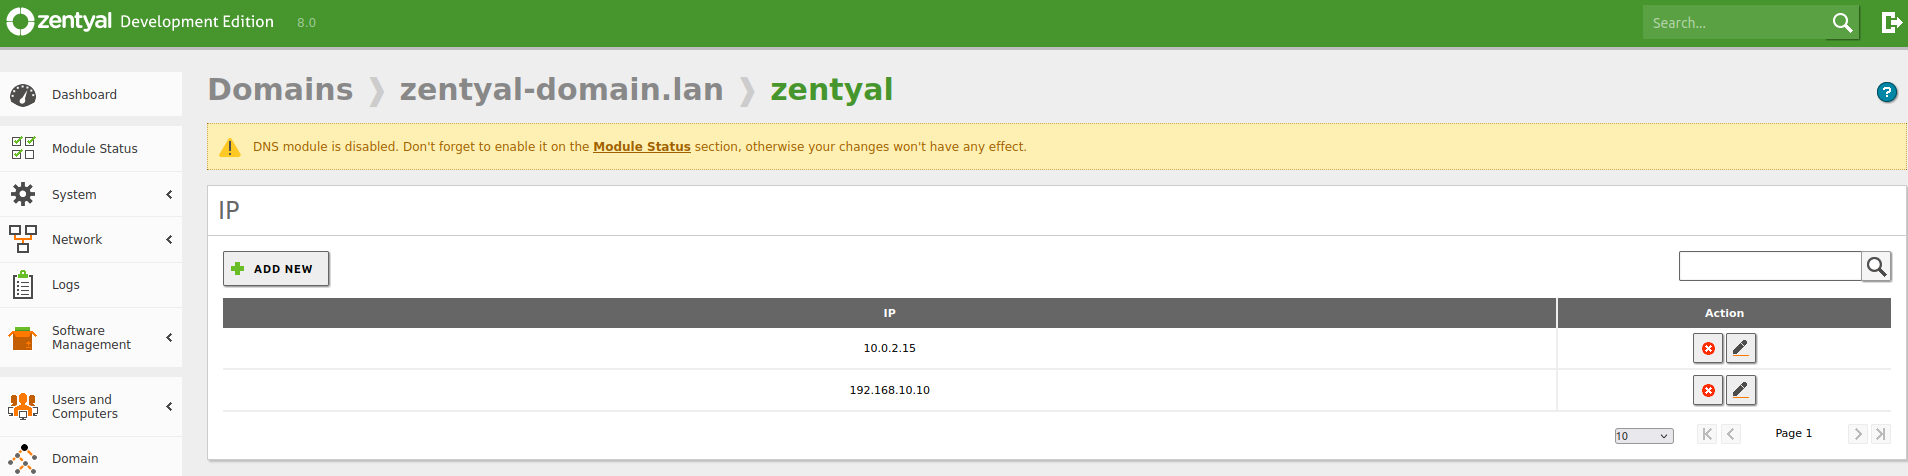
DNS record for the hostname
- We save changes if any record was modified in the previous step.
- We enable the DNS module from Enable Modules and save changes:
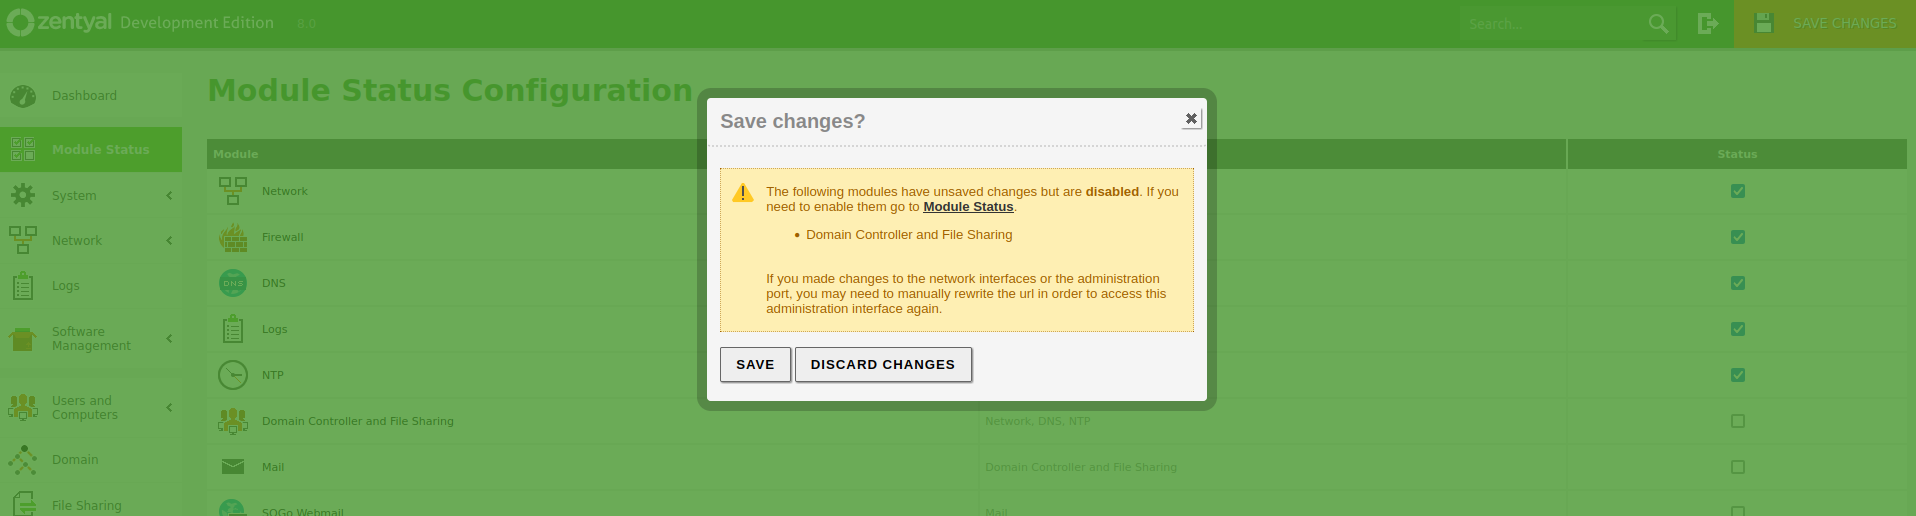
Enable DNS module
We perform the following confirmations:
We confirm that the DNS module has started correctly:
sudo zs dns status
Results:
Zentyal: status module dns: [ RUNNING ]
We confirm that the DNS module is listening on the new IP
sudo ss -tuln | egrep :53
Results:
udp   UNCONN 0      0      192.168.10.10:53         0.0.0.0:*
udp   UNCONN 0      0      192.168.10.10:53         0.0.0.0:*
udp   UNCONN 0      0          10.0.2.15:53         0.0.0.0:*
udp   UNCONN 0      0          10.0.2.15:53         0.0.0.0:*
udp   UNCONN 0      0          127.0.1.1:53         0.0.0.0:*
udp   UNCONN 0      0          127.0.1.1:53         0.0.0.0:*
udp   UNCONN 0      0          127.0.0.1:53         0.0.0.0:*
udp   UNCONN 0      0          127.0.0.1:53         0.0.0.0:*
tcp   LISTEN 0      10         10.0.2.15:53         0.0.0.0:*
tcp   LISTEN 0      10         10.0.2.15:53         0.0.0.0:*
tcp   LISTEN 0      10     192.168.10.10:53         0.0.0.0:*
tcp   LISTEN 0      10     192.168.10.10:53         0.0.0.0:*
tcp   LISTEN 0      10         127.0.0.1:53         0.0.0.0:*
tcp   LISTEN 0      10         127.0.0.1:53         0.0.0.0:*
tcp   LISTEN 0      10         127.0.1.1:53         0.0.0.0:*
tcp   LISTEN 0      10         127.0.1.1:53         0.0.0.0:*
We confirm that the modified DNS records are resolving with the new IP:
dig zentyal-domain.lan A
dig zentyal.zentyal-domain.lan A
Results:
### dig zentyal-domain.lan A
; <<>> DiG 9.18.18-0ubuntu0.22.04.2-Ubuntu <<>> zentyal-domain.lan
;; global options: +cmd
;; Got answer:
;; ->>HEADER<<- opcode: QUERY, status: NOERROR, id: 65394
;; flags: qr aa rd ra; QUERY: 1, ANSWER: 2, AUTHORITY: 0, ADDITIONAL: 1

;; OPT PSEUDOSECTION:
; EDNS: version: 0, flags:; udp: 1232
; COOKIE: 1e744af8175ad1cb0100000066a7868b2996b70fcfade79c (good)
;; QUESTION SECTION:
;zentyal-domain.lan.            IN      A

;; ANSWER SECTION:
zentyal-domain.lan.     259200  IN      A       10.0.2.15
zentyal-domain.lan.     259200  IN      A       192.168.10.10

;; Query time: 0 msec
;; SERVER: 127.0.0.1#53(127.0.0.1) (UDP)
;; WHEN: Mon Jul 29 14:09:47 CEST 2024
;; MSG SIZE  rcvd: 107

### dig zentyal.zentyal-domain.lan A
; <<>> DiG 9.18.18-0ubuntu0.22.04.2-Ubuntu <<>> zentyal.zentyal-domain.lan
;; global options: +cmd
;; Got answer:
;; ->>HEADER<<- opcode: QUERY, status: NOERROR, id: 34095
;; flags: qr aa rd ra; QUERY: 1, ANSWER: 2, AUTHORITY: 0, ADDITIONAL: 1

;; OPT PSEUDOSECTION:
; EDNS: version: 0, flags:; udp: 1232
; COOKIE: c1bebc39bdea7b6e0100000066a786ad659f6c0641b09fa1 (good)
;; QUESTION SECTION:
;zentyal.zentyal-domain.lan.    IN      A

;; ANSWER SECTION:
zentyal.zentyal-domain.lan. 259200 IN   A       10.0.2.15
zentyal.zentyal-domain.lan. 259200 IN   A       192.168.10.10

;; Query time: 0 msec
;; SERVER: 127.0.0.1#53(127.0.0.1) (UDP)
;; WHEN: Mon Jul 29 14:10:21 CEST 2024
;; MSG SIZE  rcvd: 115
Tip
If there is any data we believe to be incorrect, we will need to check the log files: /var/log/zentyal/zentyal.log and /var/log/syslog
- We enable the Domain Controller module from Enable modules and save the changes.
Enable Domain Controller Module
We perform the following confirmations:
We confirm that the Domain Controller module has started correctly and that the DNS module is still active:
sudo zs samba status
sudo zs dns status
Results:
Zentyal: status module samba:                   [ RUNNING ]
Zentyal: status module dns:                     [ RUNNING ]
We confirm that both modules are listening on the new IP:
sudo ss -tuln | egrep ':(53|139)'
Results:
udp   UNCONN 0      0        192.168.10.10:53         0.0.0.0:*
udp   UNCONN 0      0        192.168.10.10:53         0.0.0.0:*
udp   UNCONN 0      0            10.0.2.15:53         0.0.0.0:*
udp   UNCONN 0      0            10.0.2.15:53         0.0.0.0:*
udp   UNCONN 0      0            127.0.1.1:53         0.0.0.0:*
udp   UNCONN 0      0            127.0.1.1:53         0.0.0.0:*
udp   UNCONN 0      0            127.0.0.1:53         0.0.0.0:*
udp   UNCONN 0      0            127.0.0.1:53         0.0.0.0:*
tcp   LISTEN 0      10       192.168.10.10:53         0.0.0.0:*
tcp   LISTEN 0      10       192.168.10.10:53         0.0.0.0:*
tcp   LISTEN 0      50           127.0.1.1:139        0.0.0.0:*
tcp   LISTEN 0      10           127.0.1.1:53         0.0.0.0:*
tcp   LISTEN 0      10           127.0.1.1:53         0.0.0.0:*
tcp   LISTEN 0      50       192.168.10.10:139        0.0.0.0:*
tcp   LISTEN 0      50           127.0.0.1:139        0.0.0.0:*
tcp   LISTEN 0      10           127.0.0.1:53         0.0.0.0:*
tcp   LISTEN 0      10           127.0.0.1:53         0.0.0.0:*
tcp   LISTEN 0      50           10.0.2.15:139        0.0.0.0:*
tcp   LISTEN 0      10           10.0.2.15:53         0.0.0.0:*
tcp   LISTEN 0      10           10.0.2.15:53         0.0.0.0:*
We check via samba-tool that the DNS records have been correctly modified:
sudo samba-tool dns query 127.0.0.1 \
  zentyal-domain.lan @ ALL -Uadministrator
Results:
Name=, Records=4, Children=0
        SOA: serial=34, refresh=900, retry=600, expire=86400,
          minttl=3600, ns=zentyal.zentyal-domain.lan.,
          email=hostmaster.zentyal-domain.lan.
          (flags=600000f0, serial=33, ttl=3600)
        NS: zentyal.zentyal-domain.lan. (flags=600000f0, serial=33, ttl=259200)
        A: 10.0.2.15 (flags=600000f0, serial=33, ttl=259200)
        A: 192.168.10.10 (flags=600000f0, serial=33, ttl=259200)
Name=_kerberos, Records=1, Children=0
        TXT: "zentyal-domain.lan" (flags=f0, serial=9, ttl=259200)
Name=_msdcs, Records=0, Children=0
Name=_sites, Records=0, Children=1
Name=_tcp, Records=0, Children=5
Name=_udp, Records=0, Children=3
Name=DomainDnsZones, Records=0, Children=2
Name=ForestDnsZones, Records=0, Children=2
Name=zentyal, Records=2, Children=0
        A: 192.168.10.10 (flags=f0, serial=33, ttl=259200)
        A: 10.0.2.15 (flags=f0, serial=33, ttl=259200)
The domain resolves with the new IP:
dig @192.168.10.10 zentyal-domain.lan A
dig @192.168.10.10 zentyal.zentyal-domain.lan A
Results:
### dig @192.168.10.10 zentyal-domain.lan A
; <<>> DiG 9.18.18-0ubuntu0.22.04.2-Ubuntu <<>> @192.168.10.10
; zentyal-domain.lan A
;; global options: +cmd
;; Got answer:
;; ->>HEADER<<- opcode: QUERY, status: NOERROR, id: 40976
;; flags: qr aa rd ra; QUERY: 1, ANSWER: 2, AUTHORITY: 0, ADDITIONAL: 1

;; OPT PSEUDOSECTION:
; EDNS: version: 0, flags:; udp: 1232
; COOKIE: f8a3a4d7be06e5600100000066a786a5e439efeb7c2f43e2 (good)
;; QUESTION SECTION:
;zentyal-domain.lan.            IN      A

;; ANSWER SECTION:
zentyal-domain.lan.     259200  IN      A       10.0.2.15
zentyal-domain.lan.     259200  IN      A       192.168.10.10

;; Query time: 0 msec
;; SERVER: 192.168.10.10#53(192.168.10.10) (UDP)
;; WHEN: Mon Jul 29 14:13:23 CEST 2024
;; MSG SIZE  rcvd: 107

### dig @192.168.10.10 zentyal.zentyal-domain.lan A
; <<>> DiG 9.18.18-0ubuntu0.22.04.2-Ubuntu <<>> @192.168.10.10
;  zentyal.zentyal-domain.lan A
;; global options: +cmd
;; Got answer:
;; ->>HEADER<<- opcode: QUERY, status: NOERROR, id: 40976
;; flags: qr aa rd ra; QUERY: 1, ANSWER: 2, AUTHORITY: 0, ADDITIONAL: 1

;; OPT PSEUDOSECTION:
; EDNS: version: 0, flags:; udp: 1232
; COOKIE: d4d5b60363c7f5a40100000066a786683e8ff80b0166c8e (good)
;; QUESTION SECTION:
;zentyal.zentyal-domain.lan.    IN      A

;; ANSWER SECTION:
zentyal.zentyal-domain.lan. 259200 IN   A       10.0.2.15
zentyal.zentyal-domain.lan. 259200 IN   A       192.168.10.10

;; Query time: 0 msec
;; SERVER: 192.168.10.10#53(192.168.10.10) (UDP)
;; WHEN: Mon Jul 29 14:13:48 CEST 2024
;; MSG SIZE  rcvd: 115
If the DNS records have not updated correctly, we will need to use the command line to modify them as detailed in this link [4] :
# Record for the domain
sudo samba-tool dns update 127.0.0.1 zentyal-domain.lan @ \
          A 192.168.10.1 192.168.10.10 -Uadministrator

# Record for the hostname
sudo samba-tool dns update 127.0.0.1 zentyal-domain.lan zentyal A \
          192.168.10.1 192.168.10.10 -Uadministrator
Check the changes again:
sudo samba-tool dns query 127.0.0.1 zentyal-domain.lan zentyal \
      A -Uadministrator
dig @192.168.10.10 zentyal-domain.lan A
dig @192.168.10.10 zentyal.zentyal-domain.lan A
[4] Manual IP change via CLI: https://wiki.samba.org/index.php/DNS_Administration#Updating_existing_records