Certification authority (CA)
Zentyal uses OpenSSL® [4] for the management of the Certification Authority and the life cycle of the issued certificates.
| [4] | Openssl: http://www.openssl.org/ |
Certification Authority configuration with Zentyal
In Zentyal the Certification Authority module is self-managed, which means that it does not need to be enabled in Module status as other modules. However, you have to start the CA to make the functionality of the module available to other services.
Go to and you will find the form for starting the CA. You are requested to fill in the Organization Name and Days to expire fields. Optionally, it is also possible to specify the Country code (a two-letter acronym following the ISO-3166-1 standard [5]), City and State.
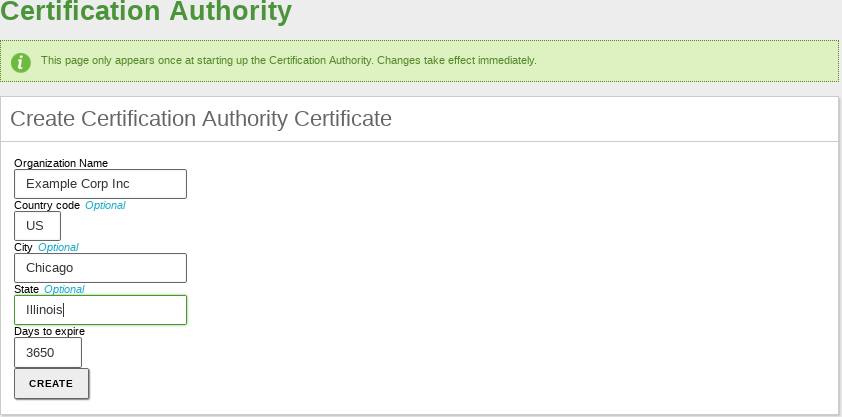
Creating the CA certificate
When setting the expiration date, you need to take into account that all certificates issued by this CA will be revoked upon expiration, stopping all services depending on those certificates.
Once the CA has been created and started, you will be able to issue certificates. The required data are the Common Name of the certificate and the Days to expire. This last field is limited by the fact that no certificate can be valid for a longer time than the CA. In case you are using the certificate for a service, such as a mail server, the Common Name of the certificate should match the domain name of that server. For example, if you are using the domain name hq.zentyal.org to access your mail server in Zentyal, you will need a certificate with the same Common Name. In case you are configuring a user certificate, the Common Name will usually be the user’s email address.
Optionally, you could set Subject Alternative Names [6] for the certificate. These are useful when setting common names to a certificate, for instance an email address when signing email messages.
Warning
All the certificates issued by the new CA will not be recognised by third party software, like web browsers or mail clients. This is because the CA that Zentyal creates is not official. However, all the traffic will be encrypted.
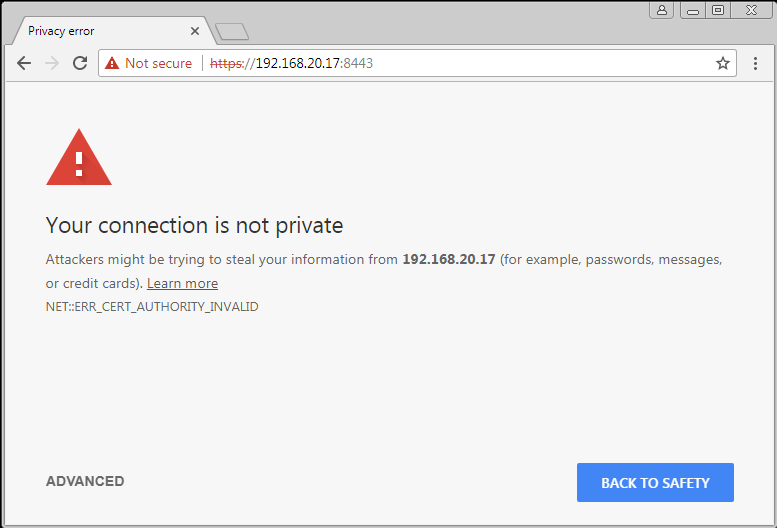
Common warning in a web browser when the CA module is used
Tip
Let’s Encrypt [7] is a free, automated, and open certificate authority (CA) that provides trusted certificates. In the last section of this document you can see an implementation guide.
Once the certificate has been issued, it will appear in the list of certificates and it will be available for the administrator and for the rest of the modules. Through the certificate list page, you can perform several actions on the certificates:
- Download the public key, private key and the certificate.
- Renew the certificate.
- Revoke the certificate.
- Reissue a previously revoked or expired certificate.

Certificate list page
The package with the keys contains also a PKCS12 file with the private key and the certificate. It can be installed directly into other programs such as web browsers, mail clients, etc.
For example, if we download the certificate corresponding to zentyal.zentyal-domain.lan, we can verify that it contains the following files:
- zentyal.zentyal-domain.lan.p12 -> Container that stores both the certificate and its private key, as well as the Certification Authority (CA) certificate
- zentyal.zentyal-domain.lan-cert.crt -> Public certificate.
- zentyal.zentyal-domain.lan-private-key.pem -> Private key of the certificate.
- zentyal.zentyal-domain.lan-public-key.pem -> Public key of the certificate.
- zentyal.zentyal-domain.lan-ca-cert.crt -> The Certification Authority’s (CA) certificate.
If you renew a certificate, the current certificate will be revoked and a new one with the new expiration date will be issued. And if you renew the CA, all certificates will be renewed with the new CA trying to keep the old expiration dates. If this is not possible because the expiration dates are after the CA expiration date, then the expiration dates are set to the expiration date of the CA.
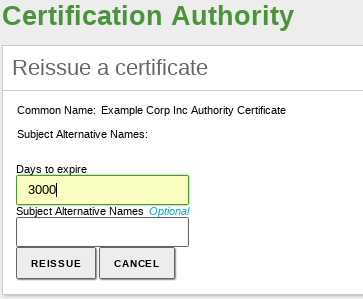
Renew a certificate
If you revoke a certificate, you will not be able to use it anymore as this action is permanent and it can not be undone. If you like, you can select the reason for the certificate revocation:
- unspecified: Reason not specified.
- keyCompromise: The private key has been compromised.
- CACompromise: The private key for the certification authority has been compromised.
- affilliationChanged: The issued certificate has changed its affiliation to another certification authority from other organization.
- superseded: The certificate has been renewed and it is now replaced by a new one.
- cessationOfOperation: The certification authority has ceased its operations.
- certificateHold: The certificate has been suspended.
- removeFromCRL: Currently unimplemented, it provides delta CRLs support, that is, lists of certificates whose revoked status has changed.
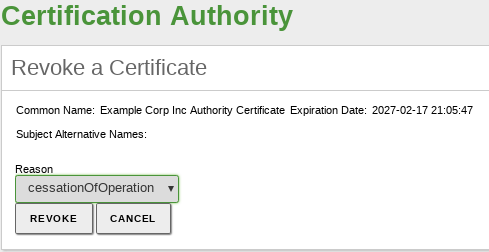
Revoke a certificate
When a certificate expires, all the modules are notified. The expiration date of each certificate is automatically checked once a day and every time you access the certificate list page.
| [5] | ISO_3166-1: http://en.wikipedia.org/wiki/ISO_3166-1 |
| [6] | Subject alternative names: https://en.wikipedia.org/wiki/Subject_Alternative_Name |
| [7] | Let’s Encrypt: https://letsencrypt.org/ |
Services Certificates
On you can find the list of Zentyal modules using certificates for their operation. Each module generates its own self-signed certificates, but you can replace them with others issued by your CA.
You can generate a certificate for each service by defining its Common Name. If a previous certificate with the name does not exist, the CA will create it automatically.
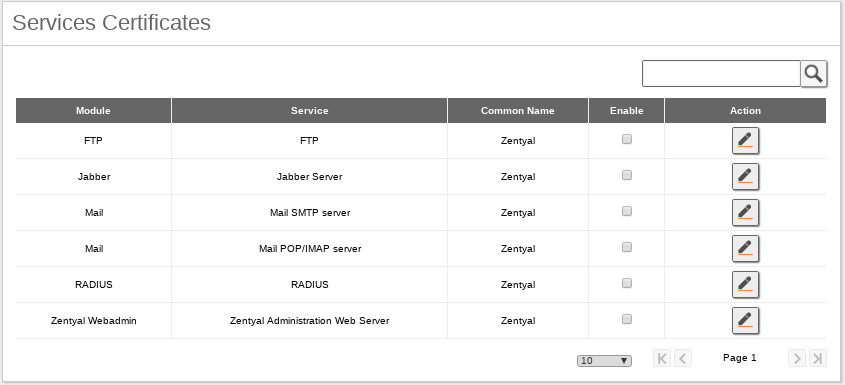
Services Certificates
Once enabled, you need to restart the service to force the module to use the new certificate. This also applies if you renew a certificate for a module.
As mentioned before, to use the secure version of multiple protocols (like mail), it is important that the name that appears in the “Common name” of the certificate matches with the name requested by the client. For example, if the Common name of your mail certificate is hq.zentyal.org and the users types in mail.hq.zentyal.org, the user will get a security alert (or the connection will be rejected) and the certificate will not be considered as a valid.
Service certificate checklist:
- The Certification Authority is created, service module is installed.
- You have created a DNS name for the service (A or CNAME) that the client can resolve, for example ‘mail.hq.zentyal.org’.
- You have issued a certificate for the specific service, let’s say ‘Mail’ with Common Name ‘mail.hq.zentyal.org’ that matches with the DNS name. After you have enabled the certificate, you should be able to see it in .
- You have enabled the secure protocols for mail.
- You have imported the CA certificate (not the service certificate) on the client’s system, or client application, let’s say the mail client.
- User configures mail as mail.hq.zentyal.org.
- User is able to resolve the DNS to an IP address, the Common Name perfectly matches what he/she typed “mail.hq.zentyal.org”, and the certificate presented by the service is signed by a trusted Authority.
- User’s application is able to start a secure session without displaying any security warnings.
Let’s Encrypt configuration
Let’s Encrypt [8] is a non-profit certificate authority run by Internet Security Research Group (ISRG) that provides X.509 certificates for Transport Layer Security (TLS) encryption at no charge. The certificate is valid for 90 days, during which renewal can take place at any time. The offer is accompanied by an automated process designed to overcome manual creation, validation, signing, installation and renewal of certificates for secure websites.
Before describing in detail how Let’s Encrypt should de deployed on Zentyal, you should be aware of the following considerations:
- Domain to which certificates are to be issued must be accessible from the Internet.
- Ports 80 and 443 must be open for Let’s Encrypt to verify the information it needs.
- Let’s Encrypt is a third-party software that is not integrated into Zentyal, so any incident in this regard will be the responsibility of the technician in charge of managing the Zentyal Server.
- You can find more information about Let’s Encrypt here [9].
The steps to install and use Let’s Encrypt in Zentyal are:
1. Install the required software packages:
sudo apt update
sudo apt install certbot python3-certbot-apache
4. Once Let’s Encrypt has been installed, you can generate the certificates. See the example below:
certbot --apache -m [email protected]
When the certificate has been correctly issued and stored on your Zentyal Server, the next step is to configure the services to use this certificate. Below you can find some of the most common paths used to establish the certificate:
- For the Zentyal Webadmin module: /usr/share/zentyal/stubs/core/nginx.conf.mas
- For the Zentyal Mail (SMTP) module: /usr/share/zentyal/stubs/mail/main.cf.mas
- For the Zentyal Mail (IMAP/POP) module: /usr/share/zentyal/stubs/mail/dovecot.conf.mas
- For the Zentyal Sogo module: /etc/apache2/sites-enabled/default-ssl.conf
- For the Zentyal Jabber module: /usr/share/zentyal/stubs/jabber/ejabberd.yml.mas
Warning
Some configuration files are managed by Zentyal, so you have to make the changes through configuration templates by using stubs [10].
| [8] | Let’s Encrypt https://en.wikipedia.org/wiki/Let%27s_Encrypt |
| [9] | Certbot https://certbot.eff.org/lets-encrypt/ubuntufocal-apache |
| [10] | Stubs https://doc.zentyal.org/en/appendix-c.html#stubs |