Appendix B: Advanced network scenarios
Let’s see how to deploy network scenarios somewhat more complex than just a virtual machine with Internet access.
Scenario 1: Base scenario, Internet access, internal networks and host network
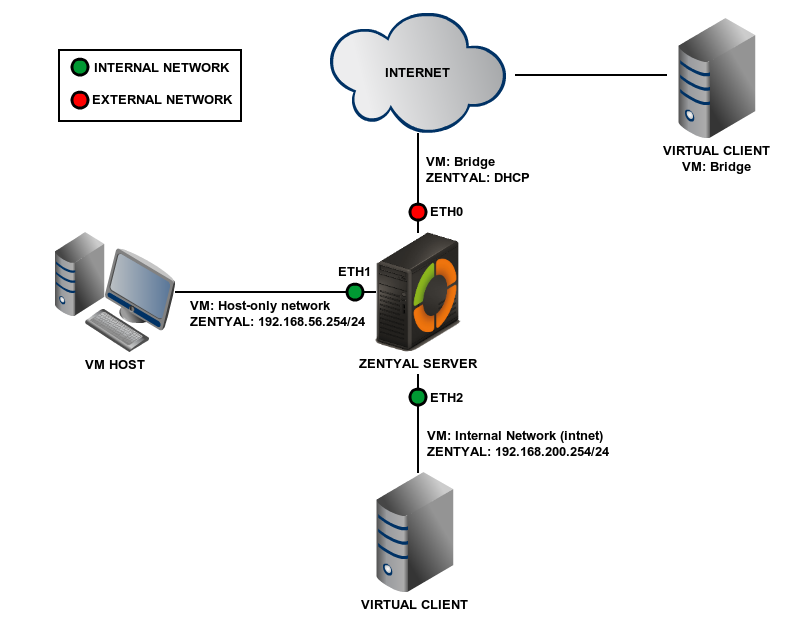
This first scenario consists of a virtualized Zentyal server with three network interfaces. The first interface (typically eth0) will link the server to the Internet, using a Bridged Adaptor connection with DHCP resolution. The second one (eth1) is a Host-Only interface type connecting with the host (real) machine. This network will work on the vboxnet0 interface (Default). The third interface (eth2) will connect the server with a virtual client, using an Internal network type connection.
The first network will connect the server to the Internet and the address will be assigned by DHCP. The second network will use the vboxnet0 interface, using the 192.168.56.0/24 range. This network is considered internal and Zentyal will use it to connect with the Host. The third network will use the intnet internal interface in VirtualBox and it will be also considered internal for Zentyal, using the 192.168.200.0/24 range.
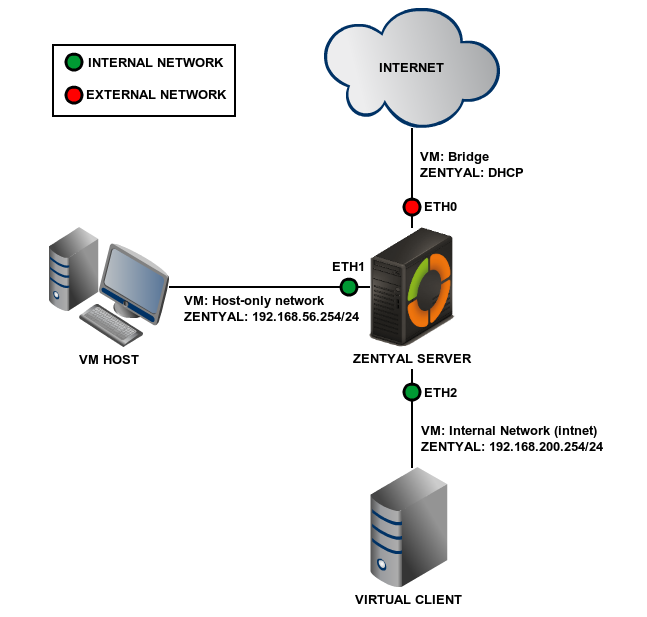
Scenario 1 diagram
In this scenario and the next ones, the part tagged as VM is the configuration for your virtual machine manager, VirtualBox in this case, and the part tagged as Zentyal is the configuration of the interface from the point of view of your Zentyal server.
From Settings –> Network on the virtual machine on which you intend to install Zentyal, connect the interfaces to a Bridged Adapter. You need to choose also the (real) physical interface that will provide Internet connection to this virtual machine.

VirtualBox Settings Network 1
Set the second interface as a Host-Only Adapter attached to vboxnet0.
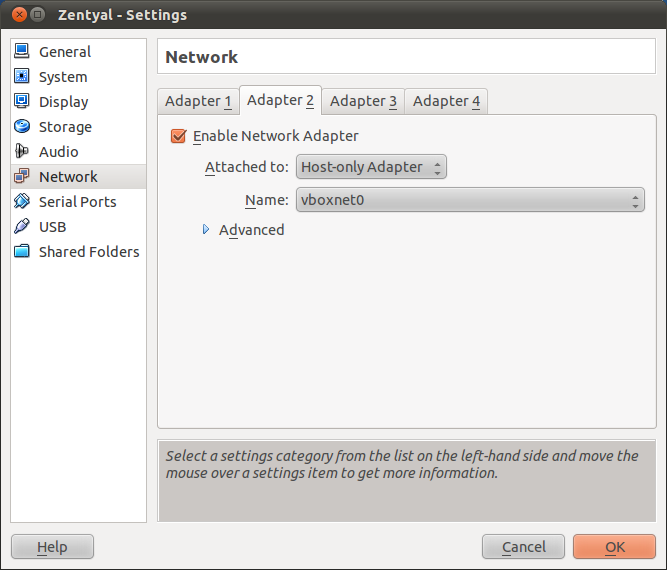
VirtualBox Settings Network 2
Set the third interface as Internal Network, named intnet. Name is important in VirtualBox, if two hosts have different names for their internal networks, they will not be connected internally by VirtualBox.
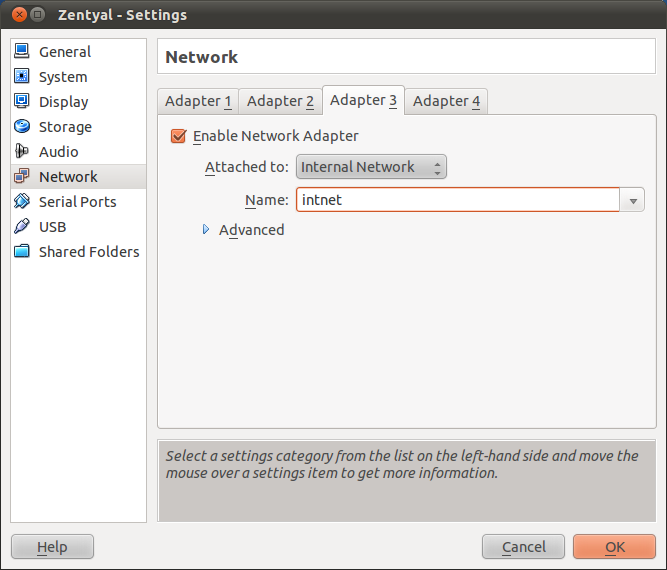
VirtualBox Settings Network 3
Now you can reboot your Zentyal server and configure its interfaces. You can use any operating system for the client machine, although we recommend Ubuntu Linux (try the lighter versions like Xubuntu or Lubuntu) for its ease of use and because it is free to download and install.
Scenario 2: Multiple internal networks
This scenario is identical to the last one but you add an extra virtual network using the range 192.168.199.0, called intnet2
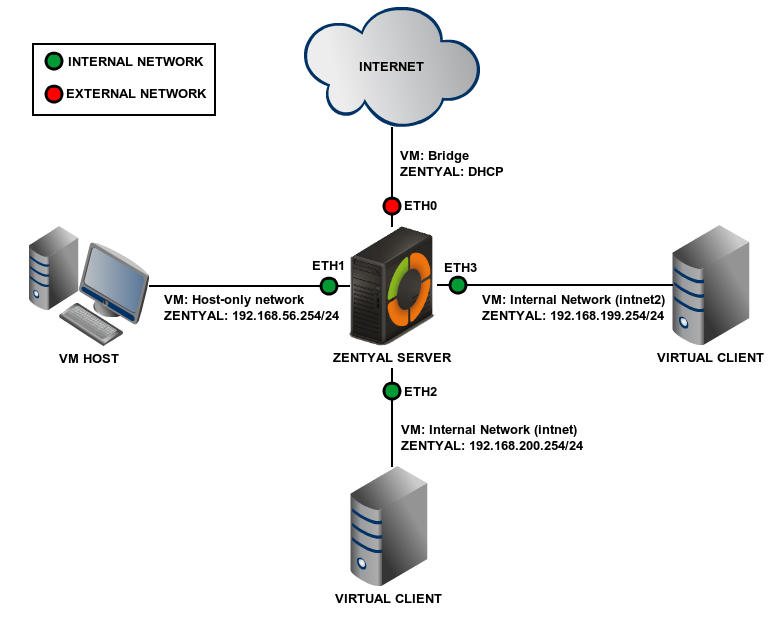
Scenario 2 diagram
This interface is internal and will be created in a similar way to that of the previous scenario, but associated with the former interface.
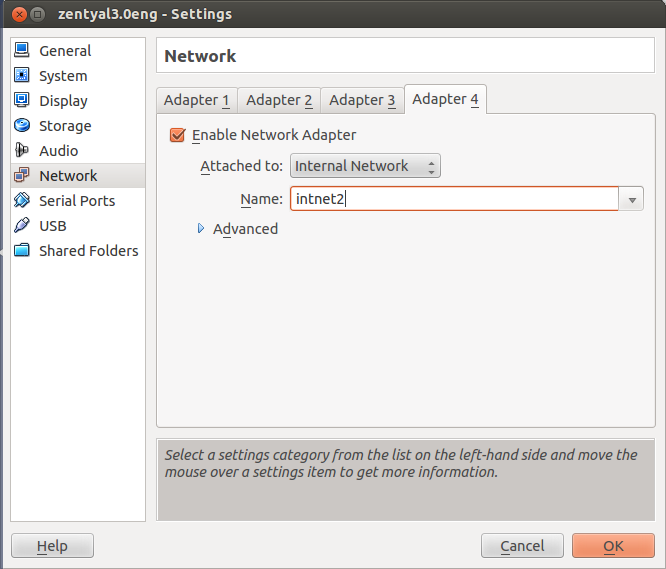
VirtualBox Settings Network 4
Scenario 3: Multiple gateways
The next scenario is targeted at deployments or exercises where you have more than one gateway, which allows you to take advantage of Zentyal traffic balancing, multigateway rules and wan-failover capabilities.
Scenario 3 diagram
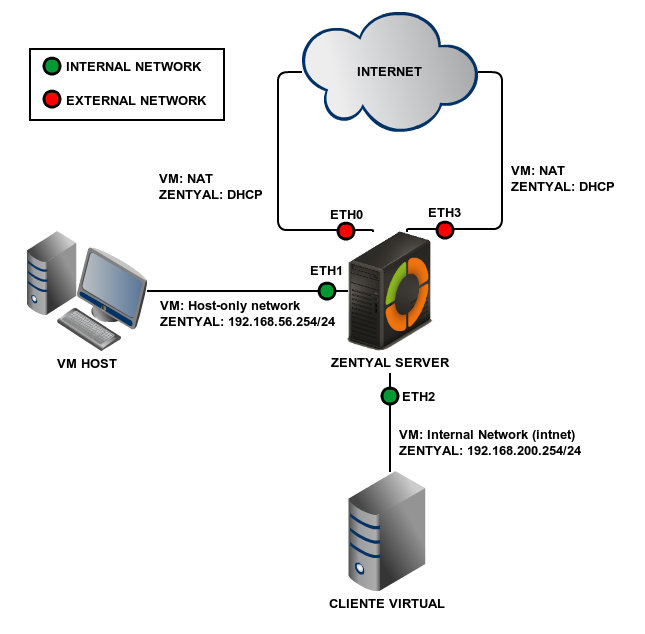
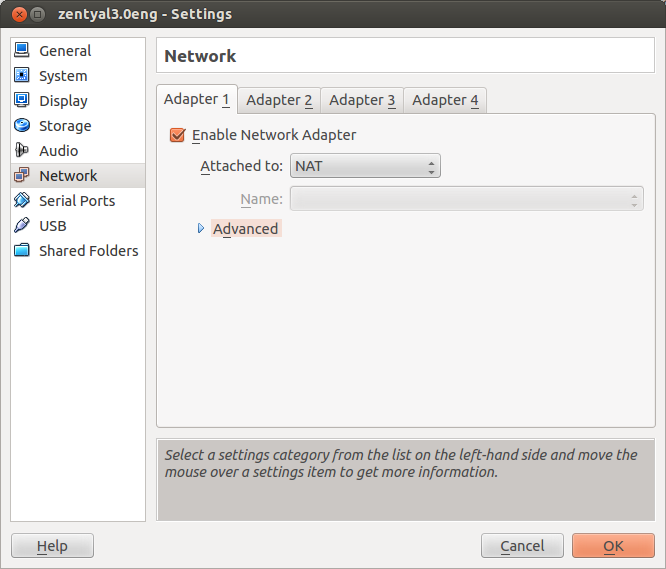
To do this, you modify the first network interface, changing it to NAT. You enable the last network interface and set the same configuration.
NAT multigateway, Adapter 1
NAT multigateway, Adapter 4
Then you will configure eth0 and eth3 as external, DHCP. This way, from the point of view of your Zentyal server there are two different gateways that can be used to reach Internet.
Scenario 4: Base scenario + external client
This scenario is similar to scenario 1, but you will have an extra client that does not access Internet through Zentyal, like the client located under eth2, but can contact Zentyal by using an external network. This scenario can be useful to check VPN connectivity, or just to check the access from Internet to any of the services offered by Zentyal and allowed in the section ‘Filtering rules from External networks to Zentyal’.
Scenario 4 diagram
The recommend configuration is to set up the network interface of the client as ‘Network Bridge’, so Zentyal can reach it through the external network. You have to take into account that Zentyal does not reply to pings unless explicitly allowed in the firewall.
Scenario 5: Multi tenancy
In this scenario you will duplicate scenario 1 to deploy an environment with multiple locations, each one managed by its own Zentyal server, suitable for scenarios with VPN tunnels, several Active Directory DCs or both.
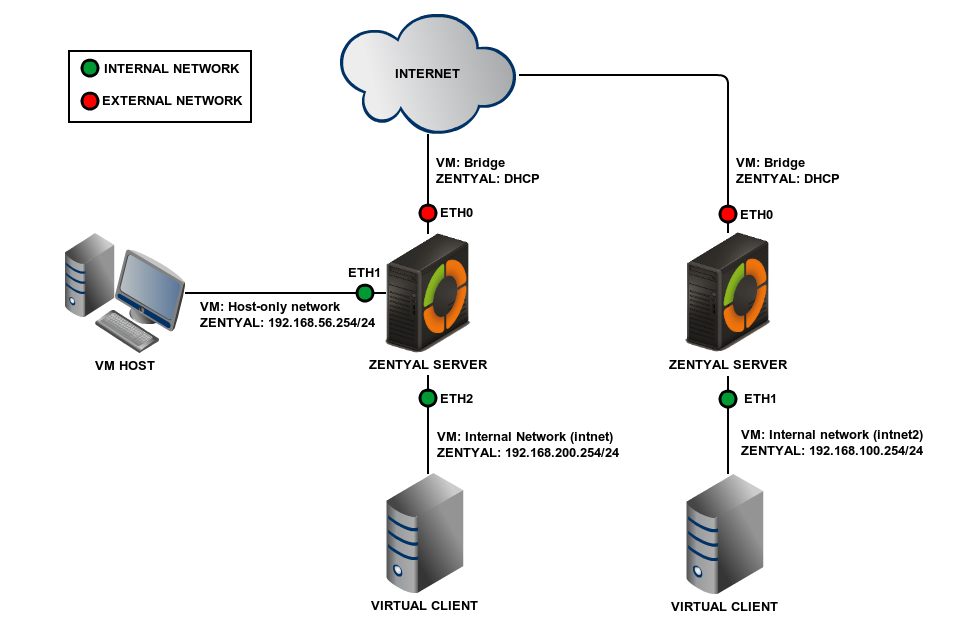
Scenario 5 diagram
It’s important to make sure that both the additional client, and the eth1 interface of the additional Zentyal server are joined to intnet2 and not intnet.