Network authentication service (RADIUS)
Zentyal integrates the FreeRADIUS [2] server, the most popular in Linux environments.
| [2] | http://freeradius.org/ |
Configuring a RADIUS server with Zentyal
To configure the RADIUS server in Zentyal, you need first to check in Module status if Users and Groups is enabled, because RADIUS depends on this. You can create a group from the menu Users and Groups ‣ Groups and add users to the system from the Users and Groups ‣ Users menu. While you are editing a group, you can choose the users that belong to it. The configuration options for users and groups are explained in detail in chapter Directory Service (LDAP).
Once you have added groups and users to your system, you need to enable the module in Module status by checking the RADIUS box.
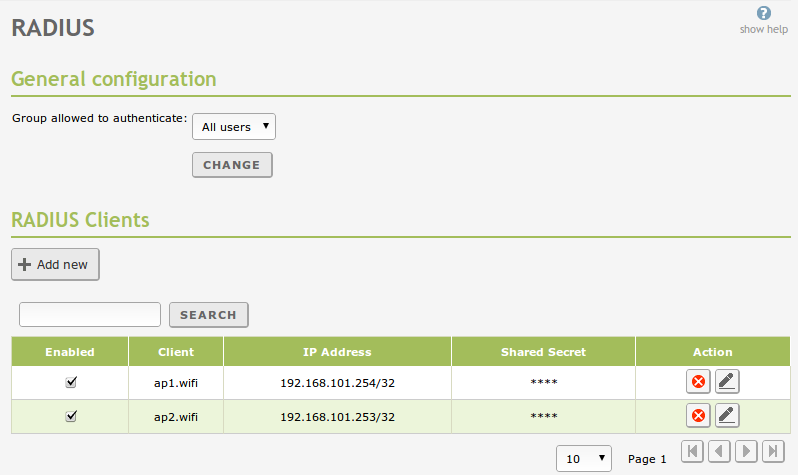
To configure the service, go to RADIUS in the left menu. Here you can define if All users or only the users that belong to a specific group will be able to access the service.
All the NAS devices that are going to send authentication requests to Zentyal must be specified in RADIUS clients. For each one you can define:
- Enabled:
- Whether the NAS is enabled.
- Client:
- Name for this client, similar idea to the host name.
- IP Address:
- The IP address or range of IP addresses from where it is allowed to send requests to the RADIUS server.
- Shared password:
- Password to authenticate and cypher the communications between the RADIUS server and the NAS. This password must be known for both sides.
