Electronic Mail Service (SMTP/POP3-IMAP4)
Introduction to the e-mail service
For sending/receiving mails Zentyal uses Postfix [5] as SMTP server. For the mail reception service (POP3, IMAP) Zentyal uses Dovecot [6]. Both come with support for secure communication over SSL. To fetch mail from external accounts, Zentyal uses Fetchmail [7] .
| [5] | Postfix The Postfix Home Page http://www.postfix.org . |
| [6] | Dovecot Secure IMAP and POP3 Server http://www.dovecot.org . |
| [7] | http://fetchmail.berlios.de/ |
SMTP/POP3-IMAP4 server configuration with Zentyal
Receiving and relaying mail
To understand the mail system configuration, the difference between receiving mail and relaying mail must be made clear.
Reception occurs when the server accepts a mail message which recipients contain an account that belongs to any of its virtual mail domains. Mail can be received from any client that is able to connect to the server.
Relay occurs when the mail server receives a message which recipients do not belong to any of its managed virtual mail domains, thus requiring forwarding of the message to other servers. Mail relay is restricted, otherwise spammers could use the server to send spam all over the Internet.
Zentyal allows mail relay in two cases:
- Authenticated users.
- A source address that belongs to a network object which has a allowed relay policy enabled.
General configuration
You can manage the authentication options Through Mail ‣ General ‣ Mail server options ‣ Authentication.
The following options are available:
- TLS for SMTP server:
- This forces the clients to connect to the mail server using TLS encryption, thus avoiding eavesdropping.
- Require authentication:
- This setting enables the use of authentication. A user must provide an e-mail address and a password to identify; once authenticated, the user can relay mail through the server. An account alias can not be used to authenticate.
General Mail configuration
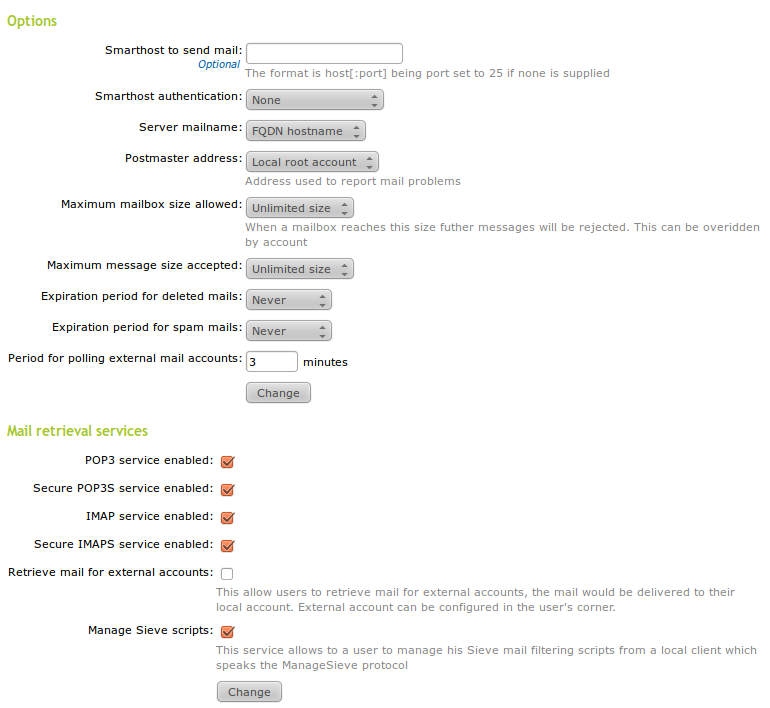
In the Mail ‣ General ‣ Mail server options ‣ Options section you can configure the general settings for the mail service:
- Smarthost to send mail:
Domain name or IP address of the smarthost. You could also specify a port appending the text :[port_number] after the address. The default port is the standard SMTP port, 25.
If this option is set, Zentyal will not send its messages directly, but each received e-mail will be forwarded to the smarthost without keeping a copy. In this case, Zentyal is an intermediary between the user who sends the e-mail and the server that actually sends the message.
- Smarthost authentication:
- This sets whether the smarthost requires authentication using a user and password pair, or not.
- Server mailname:
- This sets the visible mail name of the system; it will be used by the mail server as the local address of the system.
- Postmaster address:
The postmaster address by default is an alias of the root user, but it could be set to any account; either belonging to any of the managed virtual mail domains or not.
This account is intended to be a standard way to reach the administrator of the mail server. Automatically-generated notification mails will typically use postmaster as reply address.
- Maximum mailbox size allowed:
- Using this option you could indicate a maximum size in MB for any user’s mailboxes. All mail that exceeds the limit will be rejected and the sender will receive a notification. This setting could be overridden for any user in the Users and Groups ‣ Users page.
- Maximum message size accepted:
- It indicates, if necessary, the maximum message size accepted by the smarthost in MB. This is enforced regardless of any user mailbox size limit.
- Expiration period for deleted mails:
- If you enable this option, those mail messages which are in the users’ trash folder will be deleted when their dates exceeds the established limit.
- Expiration period for spam mails:
- This option applies, in the same way as the previous option, but refers to the users’ spam folder.
To configure the mail retrieval services go to the Mail retrieval services section. Here, Zentyal can be configured as POP3 and/or IMAP server, together with the corresponding secure versions; POP3S and IMAPS. Also, allowing the retrieval of e-mail for external accounts and ManageSieve services can be enabled in this section, which will be explained in the Mail retrieval from external accounts section.
In addition to this, Zentyal can be configured to relay mail without authentication from some network addresses. To do this, you can add relay policies for Zentyal network objects through Mail ‣ General ‣ Relay policy for network objects. The policies are based on the source mail client IP address. If relay is allowed by an object, then each object member can relay e-mails through Zentyal.
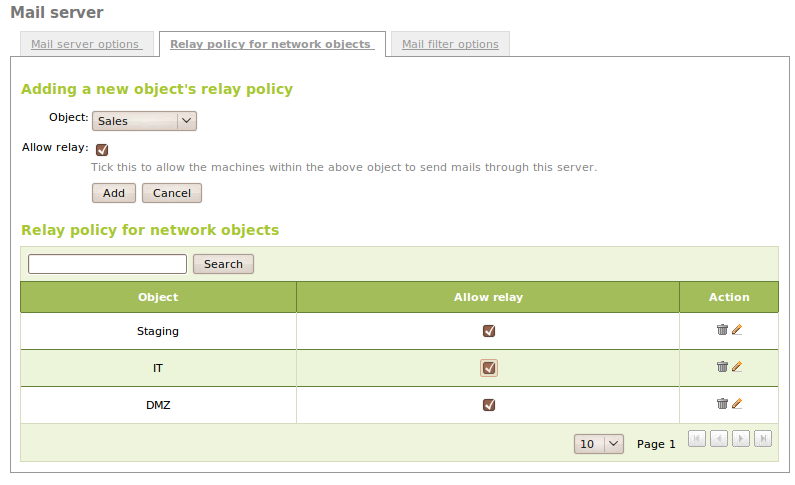
Relay policy for network objects
Warning
Be careful when using an Open Relay policy, i.e. forwarding e-mail from everywhere, since your mail server will probably become a spam source.
Finally, the mail server can be configured to use a content filter for messages [9]. To do so, the filter server must receive the message from a specific port and send the result back to another port where the mail server is bound to listen to the response. You can choose a custom mailfilter or use Zentyal as a mail filter through Mail ‣ General ‣ Mail filter options. If the mailfilter module is installed and enabled, it will be used by default.
| [9] | This topic is deeply explained in the Mail filter section. |
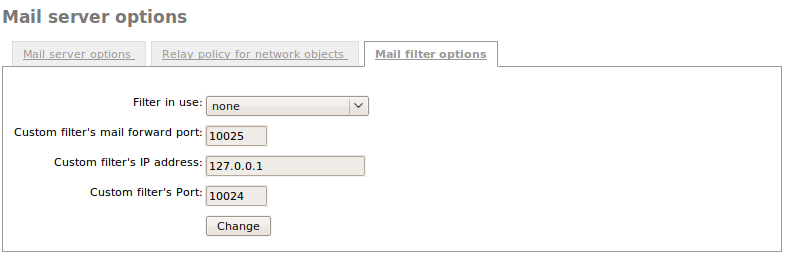
Mailfilter options
E-mail account creation through virtual domains
To set up an e-mail account, a virtual domain and a user are required. You can create as many virtual domains as you want from Mail ‣ Virtual Domains. They provide the domain name for e-mail accounts of Zentyal users. Moreover, it is possible to set aliases for a virtual domain, so that sending an e-mail to a particular virtual domain or to any of its aliases becomes transparent.
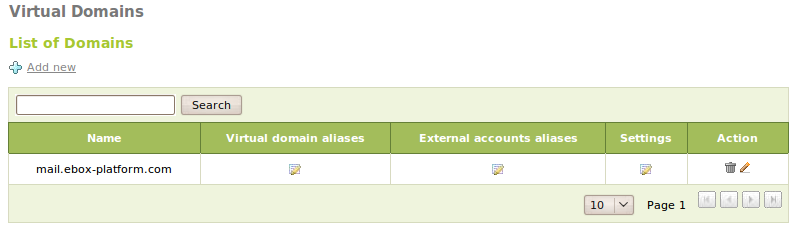
Virtual mail domains
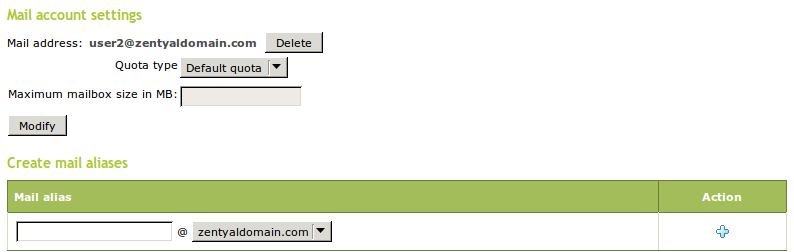
In order to set up e-mail accounts, you have to follow the same rules used when configuring filesharing. You can select the main virtual domain for the user from Users and Groups ‣ Users ‣ Edit Users ‣ Create mail account. You can create aliases if you want to set more than a single e-mail address for a user. Regardless of whether aliases have been used, the e-mail messages are kept just once in a mailbox. However, it is not possible to use the alias to authenticate, you always have to use the real account.
Mail settings for a user
Note that you can decide whether an e-mail account should be created by default when a new user is added to Zentyal. You can change this behaviour in Users and Groups ‣ Default User Template ‣ Mail Account.
Likewise, you can set up aliases for user groups. Messages received by these aliases are sent to every user of the group with an e-mail account. Group aliases are created through Users and Groups ‣ Groups ‣ Create alias mail account to group. The group aliases are only available when, at least, one user of the group has an e-mail account.
You can define an alias to an external account as well. The mail sent to that alias will be forwarded to the external account. These kind of aliases are set on a virtual domain basis and do not require an e-mail account. They can be set in Mail ‣ Virtual Domains ‣ External accounts aliases.
Users and Groups add-ons
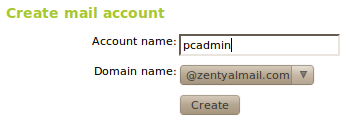
Once you have at least one configured virtual mail domain, you will find new panels under Users and Groups that will assist you managing the email accounts of your users.
Using the configured virtual domain, a mail account will be automatically created for the new users, following the format user@ourdomain. You can also change the type of quota (custom, default or no quota) and configure the maximum size of the mailbox for the custom quota.
Automatic mail configuration for new users
Another interesting add-on of the mail system can be found in Users and Groups ‣ Groups -> Edit desired group, where you can configure a mail alias for the group, in other words, an address to broadcast a message to all the members of this group. You just have to choose a name and click the ‘add’ icon.

Adding a mail alias for the group
Queue Management
From Mail ‣ Queue Management, you can see those e-mail messages that haven’t been delivered yet, together with all the information about each message. The allowed actions to perform are: deletion, content viewing or retry sending (re-queueing the message again). There are also two buttons to delete or re-queue all messages in queue.
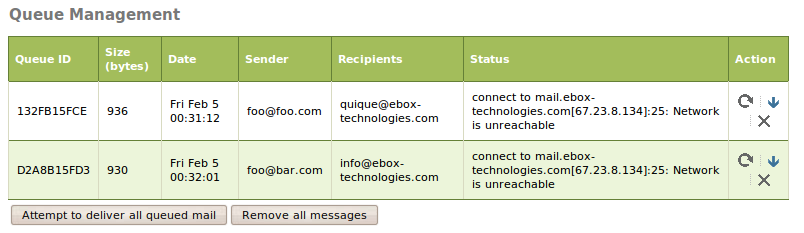
Queue management
Mail retrieval from external accounts
You could configure Zentyal to retrieve e-mail messages from external accounts, which are stored on external servers, and deliver them to the user’s mailboxes. To configure this you have to enable this service in Mail ‣ General ‣ Mail server options ‣ Retrieval services section. Once it is enabled, the users will have their mail fetched from their external accounts and delivered to their internal account’s mailbox. Each user can configure his/her external accounts through the User’s corner [10]. The user must have an e-mail account to be able to do this. The external servers are pooled periodically so e-mail retrieval is not instantaneous.
To configure his/her external accounts, a user must login in the User corner and click on Mail retrieval from external mail accounts in the left menu. In this page a list of user’s external accounts is shown and the user can add, edit and delete accounts. Each account has the following fields:
- External account:
- The username or the mail address required to login in to the external mail retrieval service.
- Password:
- Password to authenticate the external account.
- Mail server:
- Address of the mail server which hosts the external account.
- Protocol:
- Mail retrieval protocol used by the external account; it can be one of the following: POP3, POP3S, IMAP or IMAPS.
- Port:
- Port used to connect to the external mail server.
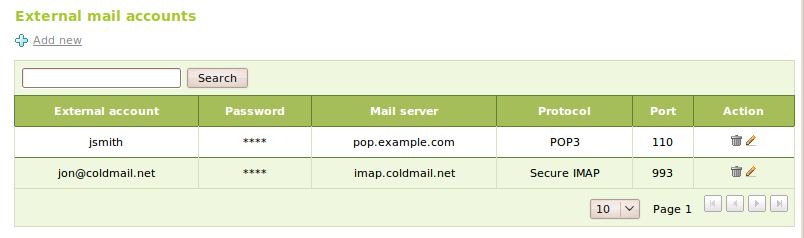
User corner settings for external accounts
| [10] | The user corner settings is explained in User’s corner section. |
Sieve scripts and ManageSieve protocol
The Sieve language [11] allows the user to control how the mail messages are delivered, so that it is possible to classify the mail in IMAP folders, forward it or use a vacation message among other things.
The ManageSieve is a network protocol that allows the users to easily manage their Sieve scripts. To be able to use ManageSieve, an e-mail client that understands this protocol is required . [12]
To enable ManageSieve in Zentyal you have to enable the service in Mail ‣ General ‣ Mail server options -> Retrieval services and it can be used by any user with an e-mail account. In addition to this, if ManageSieve is enabled and the webmail [13] module is in use, a management interface for Sieve scripts will be available in the webmail interface.
The ManageSieve authentication is achieved by using the user’s e-mail account and password.
Sieve scripts for an account are executed regardless of whether ManageSieve is enabled or not.
| [11] | For more info about Sieve http://sieve.info/ . |
| [12] | See a list of Sieve clients http://sieve.info/clients |
| [13] | The webmail module is explained in Webmail service chapter. |
E-mail client configuration
ManageSieve client parameters
To connect to ManageSieve, you will need the following parameters:
- Sieve server:
- The same as your IMAP or POP3 server.
- Port:
- 4190; beware that some applications mistakenly use port number 2000 as default for ManageSieve.
- Secure connection:
- Set to true.
- Username:
- Full e-mail address; as mentioned before, avoid using the username or any of the e-mail address aliases.
- Password:
- User’s password. Some clients allows you to select the same authentication than your IMAP or POP3 account; if this is allowed, select it.
Catch-all account
A catch-all account is an account which receives a copy of all the mail sent and received by a mail domain. Zentyal allows you to define a catch-all account for every virtual domain. To define it you must go to Mail ‣ Virtual domains and then click in the Settings cell.
All the messages sent and received by the domain will be e-mailed as Blind Carbon Copy (BCC) to the defined address. If the mail to the catch-all address bounces, it will be returned to the sender.