Electronic Mail Service (SMTP/POP3-IMAP4)
Zentyal uses Postfix [7] as a MTA for sending/receiving emails. Likewise, for the mail reception service (POP3, IMAP) Zentyal uses Dovecot [8]. Both with support for secure communication over SSL. To obtain mail from external accounts, Zentyal uses the Fetchmail [9] program.
| [7] | Postfix: http://www.postfix.org |
| [8] | Dovecot: http://www.dovecot.org |
| [9] | Fetchmail: https://sourceforge.net/projects/fetchmail/ |
SMTP/POP3-IMAP4 server configuration with Zentyal
Receiving and relaying mail
To understand the mail system configuration, the difference between receiving mail and relaying mail must be clear.
Reception occurs when the server accepts an email message in which one of the recipients is an account belonging to one of the domains managed by the server. Mail can be received from any client that can connect to the server.
Relay occurs when the mail server receives an email message in which none of the recipients belong to any of its managed virtual mail domains, thus requiring forwarding of the message to another server. Mail relay is restricted, otherwise spammers could use the server to send spam on the Internet.
Zentyal allows mail relay in two cases:
1. Authenticated users.
2. A source address belongs to a network object which has a relay allowed policy enabled.
General configuration
By going to , you can configure the general settings for the mail service:
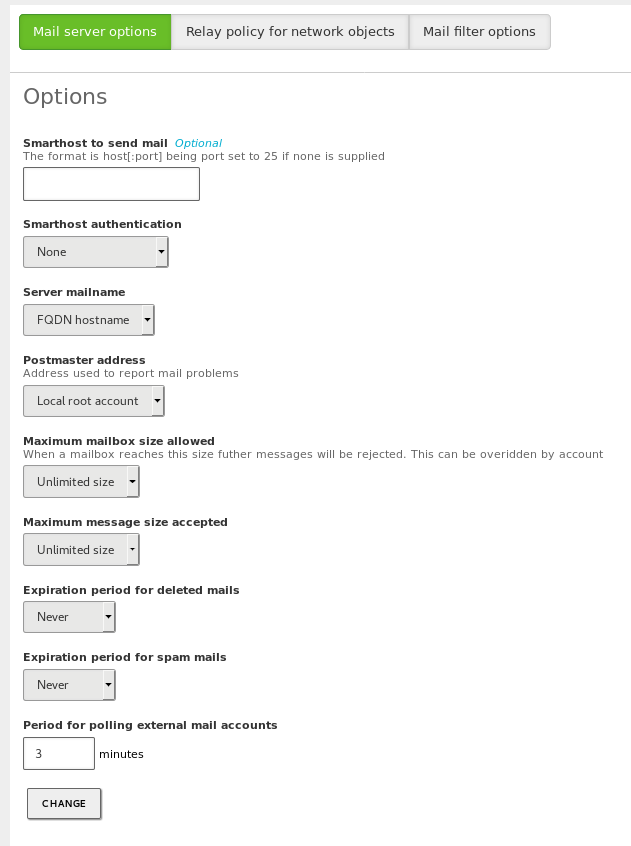
General mail configuration
- Smarthost to send mail:
If this option is enabled, Zentyal will not send the messages directly, but each received email will be forwarded to the smarthost without keeping any copy. In this case, Zentyal will act as an intermediary between the user who sends the email and the server that will finally sends the message.
In the field, you specify the IP address or domain name of the smarthost. You can also establish a port by adding the text :[port_number] after the address. The default port is the standard SMTP port, 25.
- Smarthost authentication:
- Here you determine whether the smarthost requires authentication and if so, provide a username and password.
- Server mailname:
- This sets the visible mail name of the system. It will be used by the mail service as the local address of the system.
- Postmaster address:
By default, the postmaster address is an alias of superuser (root), but it can be set to any address, belonging to any of the managed virtual mail domains or not.
This account is intended to be a standard way to reach the administrator of the mail server. Automated notification emails will typically use postmaster as the reply address.
- Maximum mailbox size allowed:
- Using this option you could set a maximum size in MB for user mailboxes. All mail that exceeds the limit, will be rejected and the sender will receive a notification. This setting could be overridden for each user in the page.
- Maximum message size accepted:
- If necessary, you can set the maximum message size in MB accepted by the smarthost. If configured, this option will be enforced regardless of whether there is or there is not any size limit in the user mailbox.
- Expiration period for deleted mails:
- If this option is enabled, deleted emails stored in the .Trash directory will be removed when their date exceeds the set limit.
- Expiration period for spam mails:
- If this option is enabled, emails marked as SPAM and stored in the .Spam directory will be removed when their date exceeds the set limit.
- Expiration period for draft mails:
- If this option is enabled, emails stored in the .Draft directory will be removed when their date exceeds the set limit.
- Period for polling external mail accounts:
- Sets the interval in minutes for checking external mail accounts for new messages. This option only takes effect if the Retrieve emails for external accounts option is enabled.
To configure the retrieval of messages, go to the Mail retrieval services section. Zentyal can be configured as a POP3 and/or IMAP server, in addition to its secure versions, POP3S and IMAPS. Here you can also allow the retrieval of email for external accounts and ManageSieve services. These two services will be explained in the Fetchmail section.
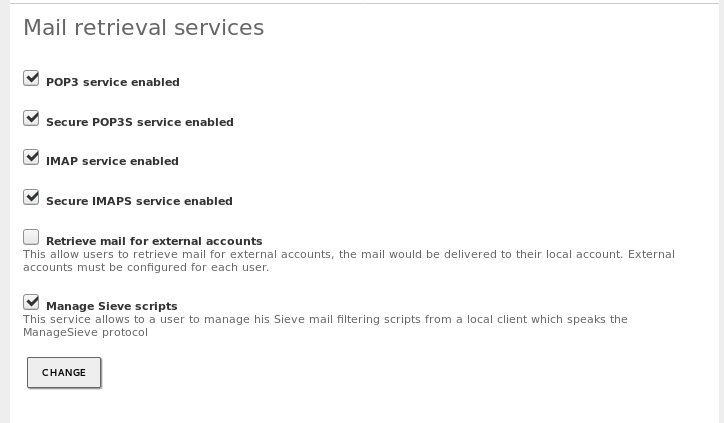
Mail retrieval configuration
In addition to this, Zentyal can be configured to relay mail without authentication from determined network addresses. To do this, you can add relay policies for Zentyal network objects through . The policies are based on the IP address of the source mail client. If you allow mail relay for this object, then any member of the object can send emails through Zentyal.
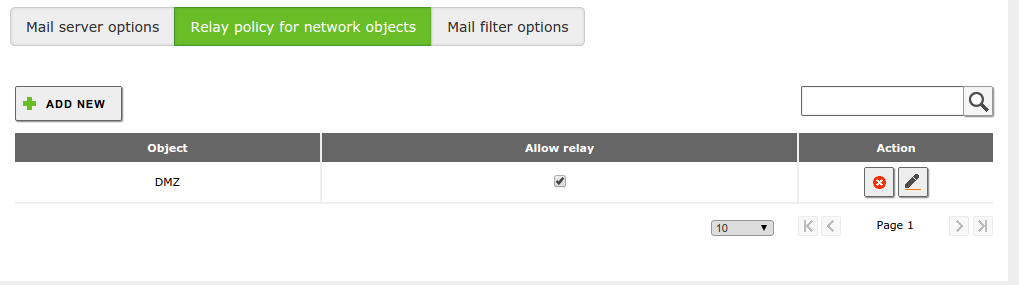
Relay policy for network objects
Warning
Be careful when using an Open Relay policy, i.e. forwarding email from everywhere. If you do this, with high probability your mail server will become a source of spam and be blacklisted.
Finally, the mail server can be configured to use a content filter for messages [11]. To do so, the filtering server must receive the mail on a specific port and send the result back to another port, where the mail server will be listening for the response. You can choose a custom mailfilter or use Zentyal as a mail filter through . If the mailfilter module is installed and enabled, it is not necessary to configure this section, since it will be used automatically by the mail module.
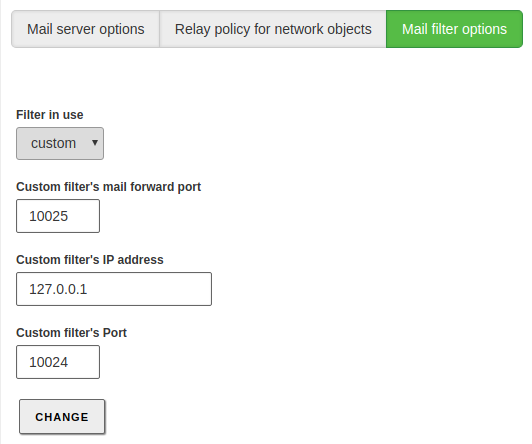
Mailfilter options
| [11] | This topic is explained in depth in the Mail filter section. |
Creation of email accounts through virtual domains
To create an email account, you must have created a user and one virtual mail domain. You can create as many virtual domains as you want from . These domains provide a domain name for email accounts of Zentyal users. Moreover, you can create aliases for a virtual domain so that sending an email to a particular virtual domain or to any of its aliases becomes transparent.
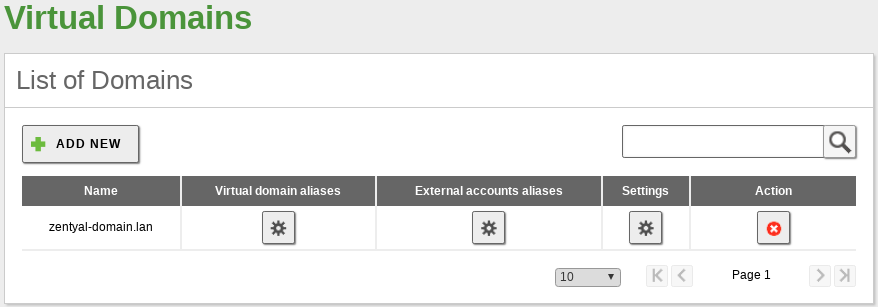
Virtual mail domains
In order to set up email accounts, you have to follow similar steps to those used to configure filesharing. Go to , select the user and add the virtual mail domain for the user. You can create aliases if you want to assign more than one email address for the same user. Regardless of the aliases used, the messages will all be stored in a single mailbox.

Mail settings for a user
Note that you can decide whether an email account should be created by default when a new user is added to Zentyal. You can configure this behaviour in .
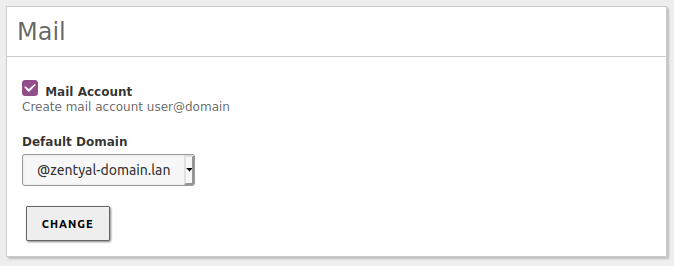
Default email account creation for a users
Likewise, you can set up aliases for groups of users. Messages received by these aliases are sent to all the users of the group with an email account. Group aliases are created at . Select the desired group and select Create an alias for the group. The group aliases are only available when, at least, one user of the group has an email account.
Finally, you can also define an alias to an external account. That is, mail accounts associated to domains that are not managed by your server. The mail sent to an alias will be forwarded to the corresponding external account. These kind of aliases are established on virtual domain basis and do not require an email account. They can be configured in .
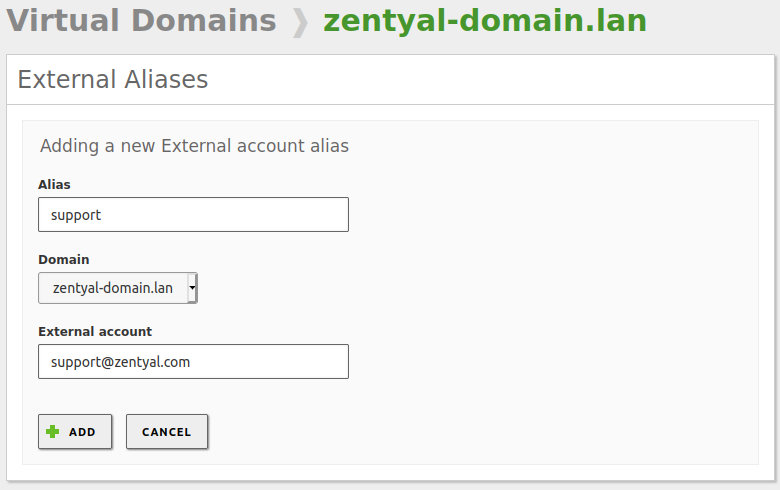
External email alias configuration
Retrieve mail from external accounts with Fetchmail
Sometimes your users want to keep getting new emails from their old accounts, for example from their previous job. If that is the case, Zentyal includes an option to use Fetchmail [12] as an additional email client for domain users.
To enable Fetchmail, go to and in the Mail retrieval services section, at the bottom of the page, you can select the Mail retrival from external accounts option.
Once you have enabled the option, save the changes. Then you can configure the external account from . Select the user and at the end of the configuration page, at Mail account settings, add the information of the external account:
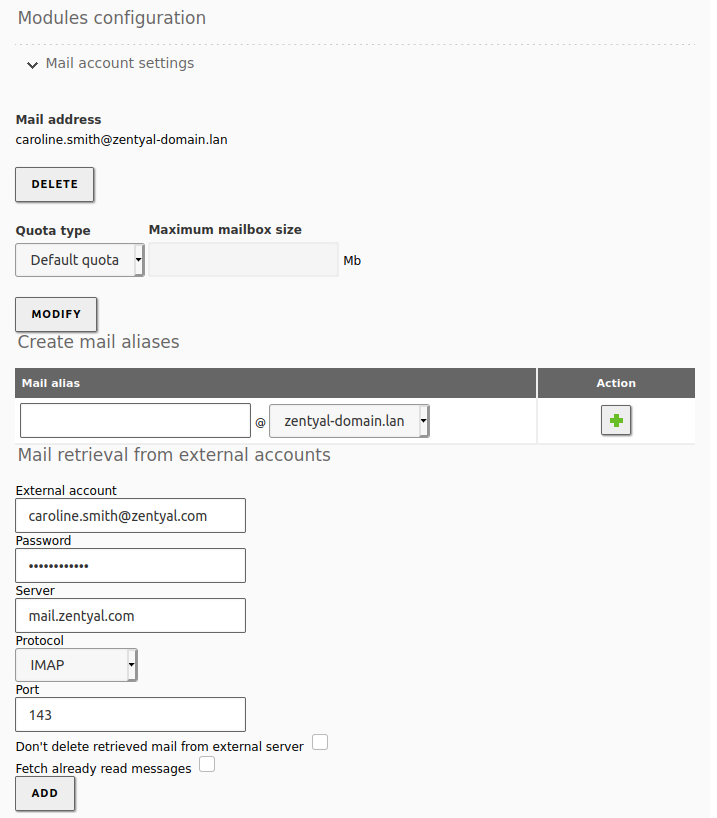
Retriving emails from an external account
| [12] | Fetchmail: https://sourceforge.net/projects/fetchmail/ |
Webmail
In addition to the native mail clients, it can be very useful to have a web-based platform from where the users can access all emails, calendars and address books. For this purpose, Zentyal integrates SOGo, an open source Groupware solution [16].
To use this module, you just need to install it and enable it. Once you have enabled the module, you can access the web platform by going to the URL ‘https://<server_FQDN>/SOGo/‘.
When you go to this URL, you can see the main login screen, where you can also choose the preferred language.
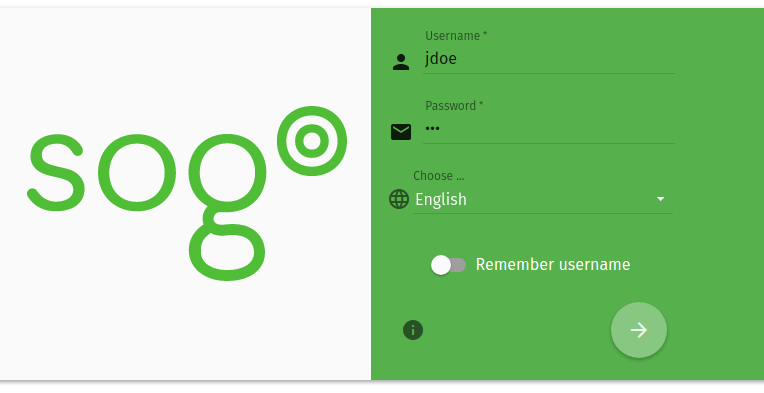
Login screen
You will first see the email interface.
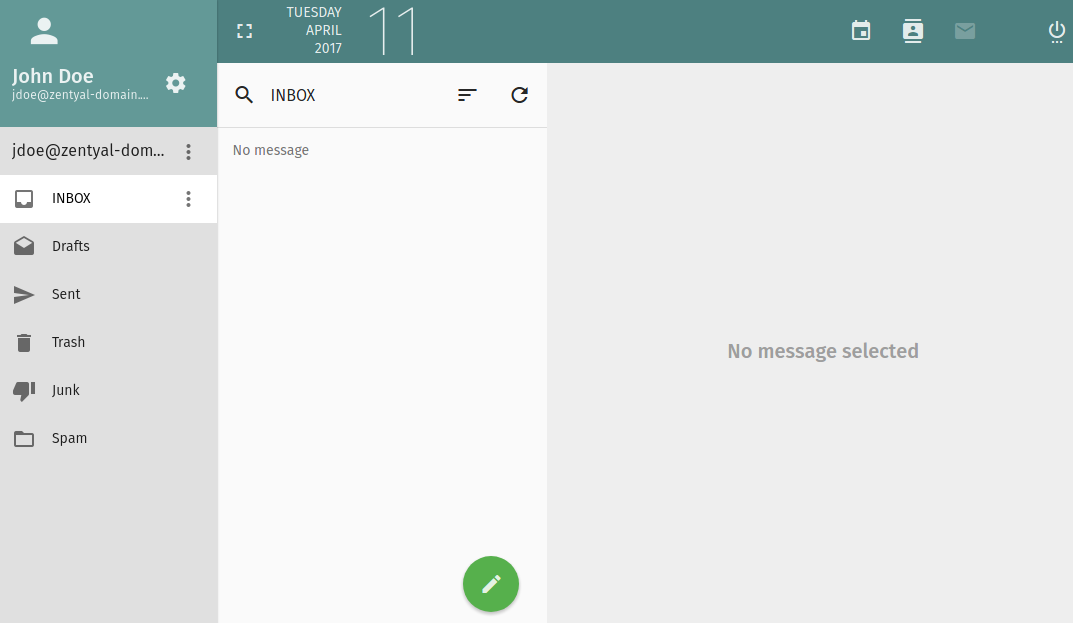
Email management
Using the icons that you have available in the top-right part of the interface, you can access the calendars.
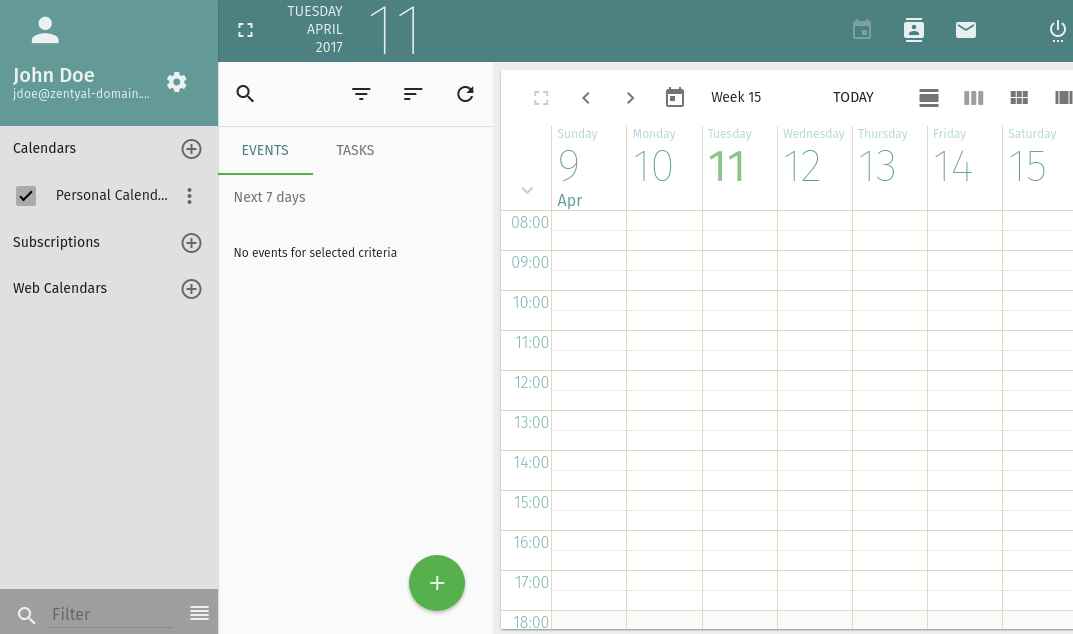
Shared calendars, events and tasks
And also the address book, where you can view the Global Address List (GAL). This contains all the users registered in your domain, the personal address books of the user and custom distribution lists that can be used for mails.
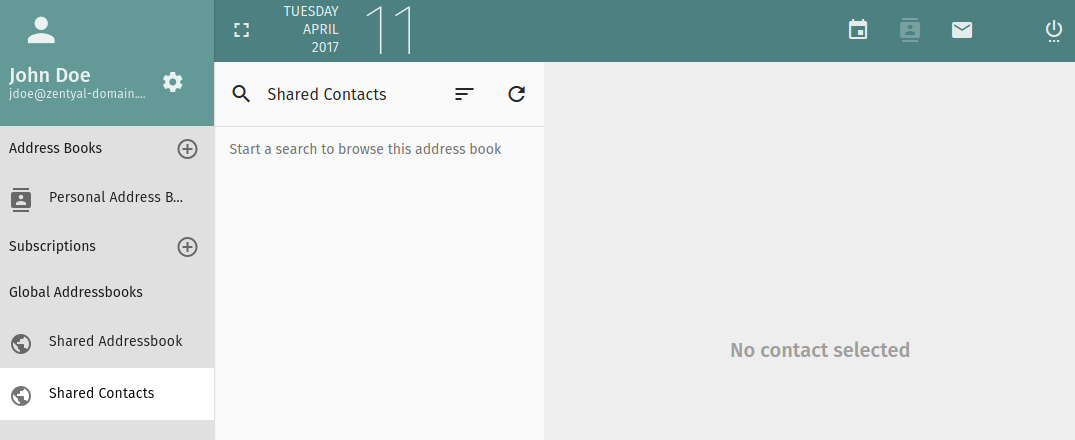
Contacts and distribution lists
| [16] | Sogo: http://sogo.nu |
ActiveSync® support
The ActiveSync® protocol is widely used to synchronize mobile devices and also the most recent versions of Microsoft Outlook.
To enable the ActiveSync support, the Sogo Webmail module needs to be installed as SOGo provides this protocol implementation in its sogo-activesync package.
Once you have installed installed and enabled the module, you will be able to enable or disable the ActiveSync option from , on the Zentyal interface.
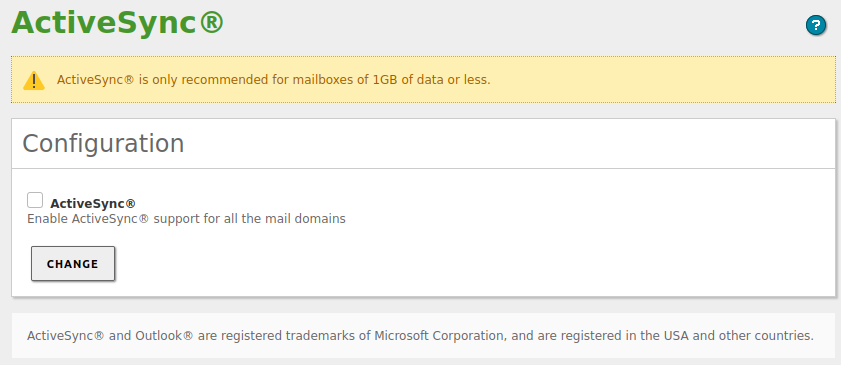
Enabling ActiveSync®
Devices will access ActiveSync through Zentyal webserver, using ports 80 and 443 (with SSL) by default.
Hardening the mail server
Because of the importance of the mail services and the continuous attacks against this service, the use of the SPF [17] protocol and the DKIM [18] authentication method have become ‘mandatory’ to increase the security of the mail services. In this section you will find a detailed explanation on how to configure the SFP record in the DNS server and how to implement DKIM on Zentyal.
| [17] | SPF: https://en.wikipedia.org/wiki/Sender_Policy_Framework |
| [18] | DKIM: https://en.wikipedia.org/wiki/DomainKeys_Identified_Mail |
SPF
To configure the SPF protocol on Zentyal, first you need to create a TXT record which stores information of the machines which have permission to send email from your domain. To do this, you can can use one of the multiple websites that use forms to help to generate the TXT record.
Tip
A recommended web page to generate the DNS record is SPFwizard [19].
An example of a DNS record of type ‘TXT’ generated:
zentyal-domain.lan.  IN TXT
   "v=spf1 mx a ip4:192.168.6.1 a:zentyal.zentyal-domain.lan -all"
Once you have the DNS record to implement the SPF protocol, you have to add it to the your DNS module.
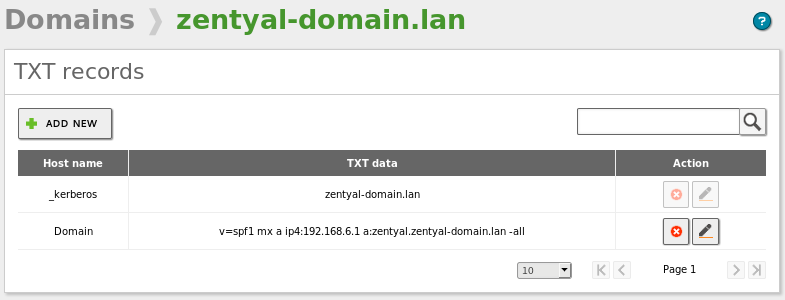
SPF TXT record
Finally, to confirm that the record has been successfully added to the domain, one of the most recommended ways is to use the MXtoolbox website [20].
| [19] | SPFwizard: https://www.spfwizard.net/ |
| [20] | SPF in MXtoolbox: https://mxtoolbox.com/spf.aspx |
DKIM
To implement this authentication mechanism, you can use a third party software called OpenDKIM. These are the steps you have to follow to deploy DKIM.
1. Install the necessary packages:
sudo apt-get install -y opendkim opendkim-tools
2. Create the folder for the DKIM keys:
sudo mkdir -vp /etc/opendkim/keys
3. Generate the DKIM keys:
sudo opendkim-genkey -s mail -d zentyal-domain.lan -D /etc/opendkim/keys
4. Create the /etc/opendkim/TrustedHosts configuration file, where you indiate the trusted hosts:
127.0.0.1
localhost
192.168.6.0/24
*.zentyal-domain.lan
5. Create the /etc/opendkim/SigningTable configuration file that will contain the domain and subdomains which will be signed by DKIM:
*@zentyal-domain.lan mail
6. Define the selector name and the path of the private key to sign the /etc/opendkim/KeyTable configuration file:
mail zentyal-domain.lan:mail:/etc/opendkim/keys/mail.private
7. Once you have finished defining these configuration files, you have to create the main OpenDKIM configuration file located in the /etc/opendkim.conf:
Mode                    sv
PidFile                 /var/run/opendkim/opendkim.pid
UserID                  opendkim:opendkim
Socket                  inet:8891@127.0.0.1
SignatureAlgorithm      rsa-sha256
AutoRestart             Yes
AutoRestartRate         10/1h
Syslog                  yes
SyslogSuccess           yes
LogWhy                  Yes
UMask                   002
OversignHeaders         From
Canonicalization        relaxed/simple

ExternalIgnoreList      refile:/etc/opendkim/TrustedHosts
InternalHosts           refile:/etc/opendkim/TrustedHosts
KeyTable                refile:/etc/opendkim/KeyTable
Signingtable            refile:/etc/opendkim/SigningTable
8. Configure the folder permissions:
chown -R opendkim:opendkim /etc/opendkim/
sudo chmod 0640 /etc/opendkim/keys/*.private
9. Next, you have to establish the address and listening port of DKIM in the /etc/default/opendkim configuration file:
SOCKET="inet:[email protected]"
10. To finish the OpenDKIM configuration, you have to start the service and enable it:
sudo systemctl restart opendkim
sudo systemctl enable opendkim
11. Then you will have to add the following configuration parameters to the /usr/share/zentyal/stubs/mail/main.cf.mas configuration template of the Mail module to use OpenDKIM:
## DKIM Configuration
milter_protocol = 6
milter_default_action = accept
smtpd_milters = inet:127.0.0.1:8891
non_smtpd_milters = inet:127.0.0.1:8891
Warning
You have to carefully read the Zentyal documentation on stubs [21] to make the change persistent to module updates.
12. Restart the Mail module to apply the changes:
sudo zs mail restart
13. Then you will have to add the TXT record to the DNS module with the content of the /etc/opendkim/keys/mail.txt configuration file. An example of its content:
mail._domainkey   IN      TXT     ( "v=DKIM1; h=sha256; k=rsa; "
"p=MIIBIjANBgkqhkiG9w0BAQEFAAOCAQ8AMIIBCgKCAQEAyn66wkANz7H
Gd2KvNadQnPRH7g4uU2Ur54VBxG8VFJJcHNCj/D3c8gAqh6kb/B8ZVQ5o
G7+1w7KLZJUKwYhPUaYZ3t8CUQOI1+klhSAJGOQRqpUkAGQcEBhSuQFBA
R057j/UZrUcwBZTONp5LrhqLWw0duC2G8UaWDdxzIyugYplzZUmtzMqzx
4jo9sjH3cRc/1kNRg7lzzvay" "Q/PxyxpEFGxsx8A6AJe0lZBbntSgXt
d3ycnVmgIlX1nn9FHJkA8/xrFcN4tyu5GHGv/zPzC9a6ah73AKNL1P+u4
yqGGBrLNkJ7ERLmmLuIOAdNisBKj9u93cT9ba7V1LD39xHiwwIDAQAB" )
; ----- DKIM key mail for zentyal-domain.lan
14. And the command [22] to add this particular record:
samba-tool dns add zentyal.zentyal-domain.lan zentyal-domain.lan \
mail._domainkey.zentyal-domain.lan TXT \
'"v=DKIM1; h=sha256; k=rsa;" "p=MIIBIjANBgkqhkiG9w0BAQEFAAOCAQ8AMIIBCgKCAQEAyn66wkANz7HGd2KvNadQnPRH7g4uU2Ur54VBxG8VFJJcHNCj/D3c8gAqh6kb/B8ZVQ5oG7+1w7KLZJUKwYhPUaYZ3t8CUQOI1+klhSAJGOQRqpUkAGQcEBhSuQFBAR057j/UZrUcwBZTONp5LrhqLWw0duC2G8UaWDdxzIyugYplzZUmtzMqzx4jo9sjH3cRc/1kNRg7lzzvay" "Q/PxyxpEFGxsx8A6AJe0lZBbntSgXtd3ycnVmgIlX1nn9FHJkA8/xrFcN4tyu5GHGv/zPzC9a6ah73AKNL1P+u4yqGGBrLNkJ7ERLmmLuIOAdNisBKj9u93cT9ba7V1LD39xHiwwIDAQAB"'
Warning
Pay attention to the content of the file before adding the TXT record.
Tip
It is important to note that TXT records in DNS typically have a limit of 255 characters per string. The DNS record for DKIM might exceed this limit, being necessary to split the public key into multiple text strings enclosed in double quotes, separated by spaces and everything in a single line.
15. Finally, to confirm that the record has been successfully added to the domain, one of the most recommended ways is to use the MXtoolbox website [23]. When sending an email, you should see an excerpt similar to this in the header of the message:
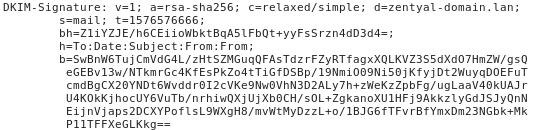
Mail header seen from SOGo with the mail signature with DKIM
| [21] | Stubs: https://doc.zentyal.org/en/appendix-c.html#stubs |
| [22] | DNS administration: https://wiki.samba.org/index.php/DNS_Administration |
| [23] | DKIM in MXtoolbox: https://mxtoolbox.com/dkim.aspx |