File Sharing
File sharing is the process by which a series of files are made available to network users, giving them access to work on, download or modify them. Zentyal uses the SMB/CIFS [5] protocol to maintain compatibility with Windows® clients. SMB/CIFS is also supported by most Operating Systems, including mobile devices and different network devices.
| [5] | SMB: http://en.wikipedia.org/wiki/Server_Message_Block |
Configuring a file server with Zentyal
Once you have enabled the Domain Controller and File Sharing module (either as a Domain Controller or as an Additional Domain Controller), the server can act as an SMB/CIFS File server.
Warning
Keep in mind that shares will not be synchronized between the different domain controllers and they are associated to the controller where they were defined.
By default, each LDAP user has a personal /home/<username> directory on the server. If the Domain Controller and File Sharing module is active, this directory will be accessible to the specific user (and only to the user) through SMB/CIFS. Furthermore, if a Windows® client is joined to the domain, this directory will be automounted as the drive H:.
To create a new shared directory, go to , Shares tab and click on Add.
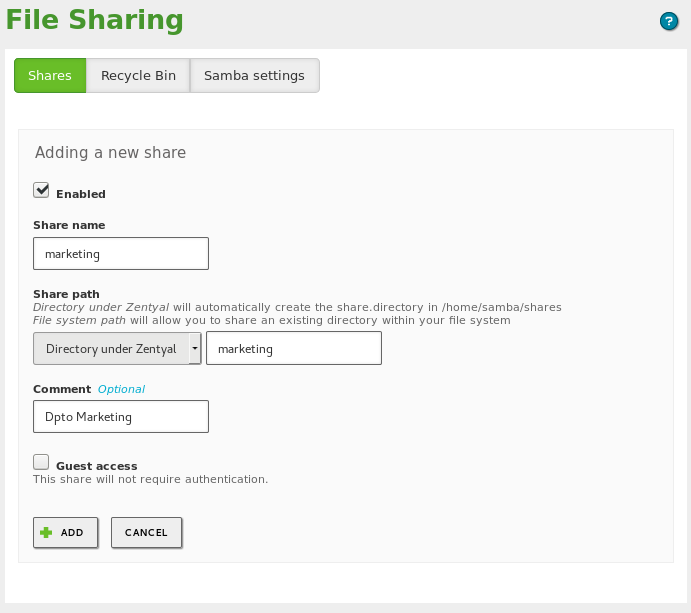
Adding a new share
- Enabled:
- Enabled by default. Leave this box checked if this directory needs to be shared. Uncheck the box to stop sharing.
- Share name:
- Name of the shared directory users will see.
- Share path:
- Directory path to be shared. The default directory is within /home/samba/shares, but you can also specify a different directory by selecting File system path.
- Comment:
- A more detailed description of the shared directory. Eases the management of shared assets.
- Guest access:
- Enabling this option allows a shared directory to be accessible without authentication. All other access policies associated with this directory will be ignored.

List of shares
Shared directories can be managed by going to Access control. By clicking on Add, you can assign read, read/write or administration permissions to users and groups. If a user is a shared directory administrator, he/she can read, write and delete any files within that directory.
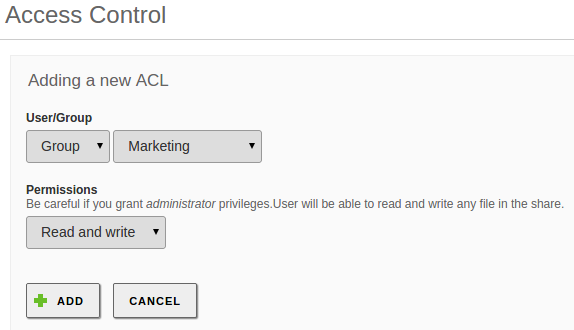
Adding a new ACL (Access Control List)
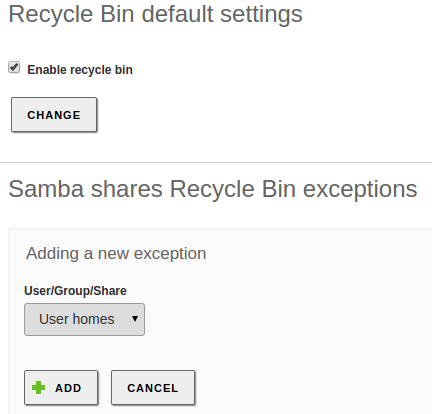
If you want to store deleted files in a special directory, called Recycle Bin,
you can check the Enable recycle bin box from the
menu, Recycle bin tab. If you do not
want to use this for all the shared resources, you can add exceptions using the
Resources excluded from Recycle Bin option. Other default settings
of this feature, such as the directory name, can be modified from the
/etc/zentyal/samba.conf file.
Recycle bin
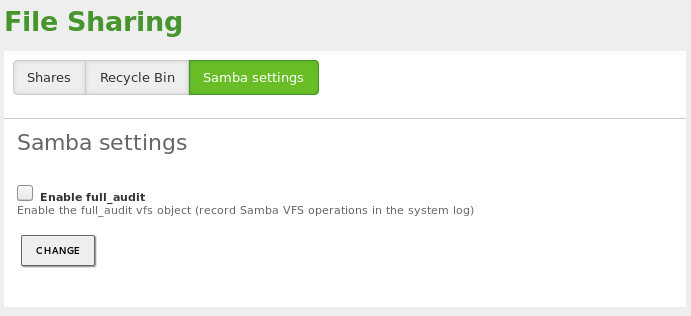
In case you are using the Commercial Zentyal Edition, it is also possible to
enable the Audit mode for the shared resources. Go to
, Samba settings tab and check the
Enable full audit box. This mode allow you to keep a record of all
the operations performed on the shared resources in the
/var/log/syslog log file.
Enable Audit mode
Warning
Keep in mind that when you enable the Audit mode-feature, multiple actions are performed on shared resources in a very short period of time. It is possible that access to these resources will be slowed down due to the writing that the system must perform on the log file.
If you are using a Commercial Zentyal Edition, you have access to the configuration, in the left-hand menu, where you can enable virus analysis for your shared files. You can also add exceptions for the folders that do not require virus check. The Antivirus module has to be installed and enabled to use this feature. The check is done in real time when trying to access a file. If an infected file is detected, it will result in an Access denied error.
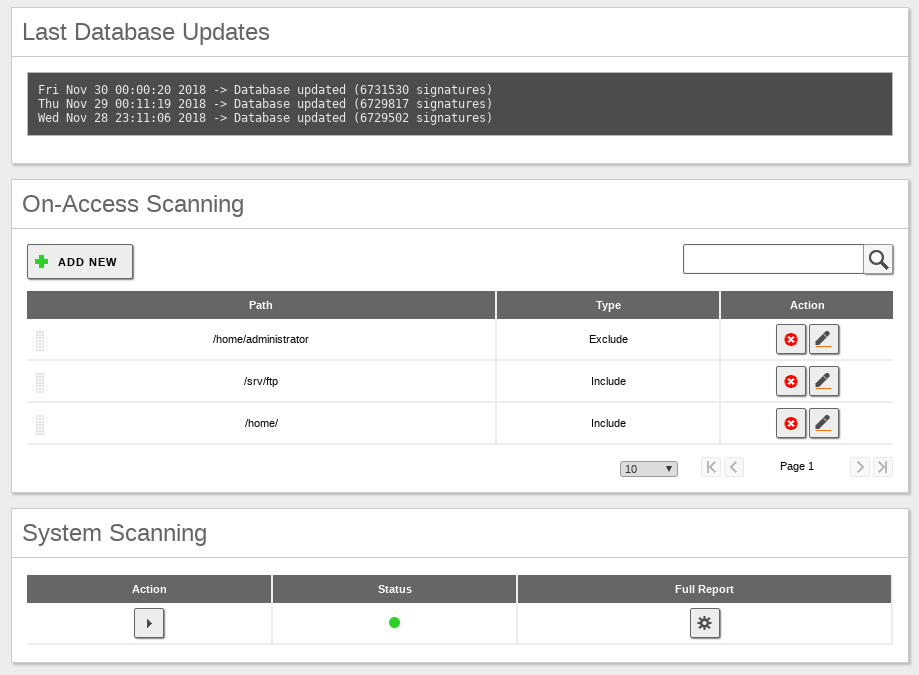
Antivirus configuration for shared files
As you can see in the screenshot, to prevent access to infected files you need to define the necessary paths in On-Access Scanning. By default, the entire /home path is included, which in turn recursively includes the /home/samba/shares with the Zentyal shared folders. You also have an exclusion rule for /home/admin and an inclusion rule for a path outside /home in order to check the files uploaded by FTP.